Showing posts with label two. Show all posts
Showing posts with label two. Show all posts
Thursday, August 25, 2016
Configure Two Ironport C Series Devices Where the Backup Hosts the Quarantine
Configure Two Ironport C Series Devices Where the Backup Hosts the Quarantine
These steps come straight from Cisco and it works like a charm. This allows the primary device to focus on email filtering and the second device to take care of the quarantine work. I have another post on how to sync the SLBL on these two devices since users will be getting their information from the backup IronPort.
How to configure two C-Series devices where the backup hosts the Quarantine
Question: How to configure two C-Series devices where the backup hosts the Quarantine Answer All-in-one-plus-one IronPort Spam Quarantine Configuration
Note: This approach will not work if using Centralized Management.
Many sites will run two IronPort appliances, one that is designated as the "Primary MX" server and processes the majority of mail, and a second appliance as a hot spare that is designated as the "Secondary MX." If the Primary MX should become unavailable for any reason, then the normal SMTP protocol will redirect traffic to the Secondary MX until the primary is available again. For sites that wish to deploy the IronPort Spam Quarantine feature for their end-users but do not have enough traffic to justify a dedicated M-Series appliance, we offer the below configuration hints to allow you to configure the Secondary MX system to act as a centralized quarantine for both appliances, and to tell the Primary MX that messages detected as spam should be sent to that central quarantine on the Secondary MX system.
Please note that this configuration should only be used by sites that are not at or near the peak performance throughput on their Primary MX server, or doing equal-weighted load balancing between two appliances, as the additional load of processing end-user quarantined messages could result in reduced throughput in the event of a Primary-to-Secondary fail-over. For high-volume sites whose multiple appliances are running at or near peak throughput, we recommend deployment of the M-Series appliance to offload quarantine duties from your C-Series appliances.
The second IronPort MGA that will contain the IronPort Spam Quarantine, must be able to identify messages coming from the Primary MTA and force the messages to the Quarantine. This can be accomplished by using an X-Header once a messages is identified as spam.
To avoid having two IronPort C-Series MGAs scanning the same message be sure to perform the following steps.
Procedure overview:
1. On the Primary
1. Ensure messages received from Primary MX MGA are scanned for Anti-Spam filtering
2. When Spam Positive and/or Suspect Positive, send to the IronPort Spam Quarantine and add X-Header: X-Ironport-Quarantine
2. On the Secondary
1. add a Mail Flow Policy which by-passes Anti-Spam scanning
2. Add a new Sender Group called "Quarantine_From_Primary", set the order # to 1.
3. Configure this Sender Group to accept messages from the Primary appliance
4. Configure this Sender Group to use the Mail Flow Policy created previously
5. Configure the local quarantine on the "secondary" MGA
6. Edit Log Global Settings to monitor the X-header: X-Ironport-Quarantine
3. Test
If this is not setup correctly one message will actually be scanned by both MGA’s before ending up in the quarantine.
(The following example is using a Sender Group on the secondary MX MGA called "QUARANTINE_FromMail2")
Primary Server
Thu Apr 27 15:05:45 2006 Info: New SMTP ICID 1348 interface Mail (192.168.1.2) address 1.1.1.1 reverse dns host pproxy.gmail.com verified yes
Thu Apr 27 15:05:45 2006 Info: ICID 1348 ACCEPT SG SUSPECTLIST match sbrs[-2.0:-0.5] SBRS -1.4
Thu Apr 27 15:05:45 2006 Info: Start MID 1661 ICID 1348
Thu Apr 27 15:05:45 2006 Info: MID 1661 ICID 1348 From:
Thu Apr 27 15:05:45 2006 Info: MID 1661 ICID 1348 RID 0 To:
Thu Apr 27 15:05:45 2006 Info: Start MID 1661 ICID 1348
Thu Apr 27 15:05:45 2006 Info: MID 1661 ICID 1348 From:
Thu Apr 27 15:05:45 2006 Info: MID 1661 ICID 1348 RID 0 To:
Thu Apr 27 15:05:45 2006 Info: MID 1661 Message-ID <16ac64320604271305o755483cdx28677153c5e4032@mail.spammer.com>
Thu Apr 27 15:05:45 2006 Info: MID 1661 Subject Fwd: Impotenc-e hellp no doc visilt
Thu Apr 27 15:05:45 2006 Info: MID 1661 ready 13559 bytes from
Thu Apr 27 15:05:45 2006 Info: MID 1661 matched all recipients for per-recipient policy DEFAULT in the inbound table
Thu Apr 27 15:05:51 2006 Info: MID 1661 using engine: CASE spam positive
Thu Apr 27 15:05:51 2006 Info: EUQ: Tagging MID 1661 for quarantine
Thu Apr 27 15:05:51 2006 Info: MID 1661 antivirus negative
Thu Apr 27 15:05:51 2006 Info: EUQ: Tagging MID 1661 for quarantine (X-Ironport-Quarantine)
Thu Apr 27 15:05:51 2006 Info: MID 1661 queued for delivery
Thu Apr 27 15:05:51 2006 Info: Delivery start DCID 4789 MID 1661 to RID [0] to offbox IronPort Spam Quarantine
Thu Apr 27 15:05:51 2006 Info: Message done DCID 4789 MID 1661 to RID [0]
Thu Apr 27 15:05:51 2006 Info: MID 1661 RID [0] Response ok: Message 22017 accepted
Thu Apr 27 15:05:51 2006 Info: Message finished MID 1661 done
Secondary Server
Thu Apr 27 15:05:50 2006 Info: New SMTP ICID 121070 interface Mail (192.168.1.2) address 192.168.1.2 reverse dns host unknown verified no
Thu Apr 27 15:05:50 2006 Info: ICID 121070 ACCEPT SG QUARANTINE_FromMail2 match 192.168.1.2 SBRS rfc1918
Thu Apr 27 15:05:50 2006 Info: Start MID 22017 ICID 121070
Thu Apr 27 15:05:50 2006 Info: MID 22017 ICID 121070 From:
Thu Apr 27 15:05:50 2006 Info: MID 22017 ICID 121070 RID 0 To:
Thu Apr 27 15:05:55 2006 Info: ICID 121070 close
Thu Apr 27 15:05:50 2006 Info: Start MID 22017 ICID 121070
Thu Apr 27 15:05:50 2006 Info: MID 22017 ICID 121070 From:
Thu Apr 27 15:05:50 2006 Info: MID 22017 ICID 121070 RID 0 To:
Thu Apr 27 15:05:50 2006 Info: MID 22017 Message-ID <16ac64320604271305o755483cdx28677153c5e4032@mail.spammer.com>
Thu Apr 27 15:05:50 2006 Info: MID 22017 Subject [SPAM] Fwd: Impotenc-e hellp no doc visilt
Thu Apr 27 15:05:50 2006 Info: MID 22017 ready 13907 bytes from
Thu Apr 27 15:05:50 2006 Info: MID 22017 matched all recipients for per-recipient policy DEFAULT in the inbound table
Thu Apr 27 15:05:50 2006 Info: EUQ: Tagging MID 22017 for quarantine (X-Ironport-Quarantine)
Thu Apr 27 15:05:50 2006 Info: MID 22017 queued for delivery
Thu Apr 27 15:05:54 2006 Info: RPC Delivery start RCID 10882 MID 22017 to local IronPort Spam Quarantine
Thu Apr 27 15:05:54 2006 Info: EUQ: Quarantined MID 22017
Thu Apr 27 15:05:54 2006 Info: RPC Message done RCID 10882 MID 22017
Thu Apr 27 15:05:54 2006 Info: Message finished MID 22017 done
Detailed Steps for Primary Server
1. Ensure messages received from Primary MX MGA are scanned for Anti-Spam filtering
1. Ensure that Anti-Spam scanning is enabled
2. Configure the appropriate Anti-Spam policies on the Incoming Mail Policies page to send Positive and/or Suspect spam to the IronPort Spam Quarantine (now hosted on the Secondary MX appliance)
1. (Mail Policies -> Email Security Manager -> Incoming Mail Policies)
2. Configure the default Mail Policies: Anti-Spam settings ; Positively-Identified Spam Settings actions also to include additional X-header:
1. Header Name: X-Ironport-Quarantine
2. header Text: offbox (any text value will work)
3. If desired, repeat the above for Suspected Spam Settings
4. Setup an External Quarantine
1. Designate the Secondary MX appliance as an External Quarantine host by navigating to Monitor -> Quarantines -> External Quarantines
2. Click the "Add Quarantine..." button
3. Enter a descriptive name so you know you are routing to your Secondary MX appliance
4. Enter the IP address of the Secondary MX appliance
5. Change the default port from 6025 to 25
6. Submit
7. Commit changes
Detailed Steps for Secondary Server
1. On IronPort that will host the Quarantine (Secondary) add a Mail Flow Policy
1. Select the Mail Flow Policies, beneath the HAT Overview
2. Click the Add Policy, button
3. Name the policy, example: SpamQuarantine
4. Connection Behavior set to Accept
5. In the Security Features, turn off Virus Protection and Spam Protection
6. Turn Off Sender Verification
7. Select Submit
2. Add a new Sender Group called "Quarantine_From_Primary", set the order # to 1.
1. Open the HAT Overview, add a new Sender Group
2. Click Add Sender Group
3. Name: Quarantine_From_Primary
4. Set Order to 1
5. Add comments
6. Select the new Policy created, example SpamQuarantine
7. Leave other fields, unchecked
8. Click the Submit and Add Senders, at the bottom right.
9. Enter the IP of the Primary IronPort.
10. Add comments
11. Check Submit
12. Configure Local Quarantine
13. Enable Local quarantines
14. Monitor-> Quarantines-> Local Quarantines
3. Edit Log Settings
1. System Administration > Log Subscriptions -> "Global Settings" box,
2. click "Edit Settings..."
3. In the "Headers (Optional)" text box add: X-Ironport-Quarantine
4. Test
1. Send messages that have spam (use X-header: X-Advertisement: spam)
2. Send messages that do not contain spam
3. Review the logs

Monday, August 1, 2016
Enable Two step verification for your Naver account
Enable Two step verification for your Naver account
Today Ill walk you through a brief tour of enabling two-step protection on your Naver account.
Two-step verification, or Two-factor authentication (i.e. getting a code on your phone to sign-in), adds an important layer of security to your account. I have this set-up on my Google account. I didnt notice this until recently, but Naver (???) also lets you enable this security feature, though they refer to it as OTP. With all the hacking stories out there, its useful to "set it and forget it." Its pretty simple if youre already familiar with 2-step authentication, with one main difference: the Naver app itself is used for generating the codes. But well get to that.
Creating a Naver Account
The brilliant thing is that 90% of all this process can be done in English. Creating a Naver account and editing all major account settings on Naver can all be done in English (and Chinese), even though most Naver function beyond that are only in Korean. No Alien ID Numbers (??? ?? ??) or passport numbers are needed; but you will need a mobile phone to receive a verification code. I was required to enter a Korean (+82 prefix) phone number, but when signing-up from abroad, you can choose from an international country drop-down list.
---
Enabling the Protection
Once youve created your Naver account (and it really is super simple), we can enable the Two-step verification.
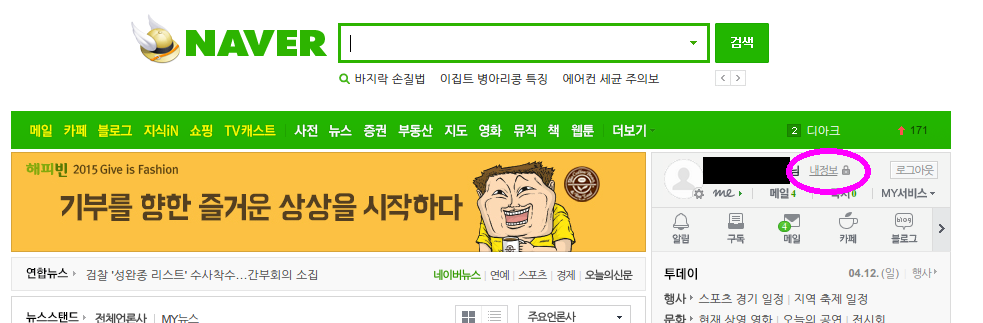
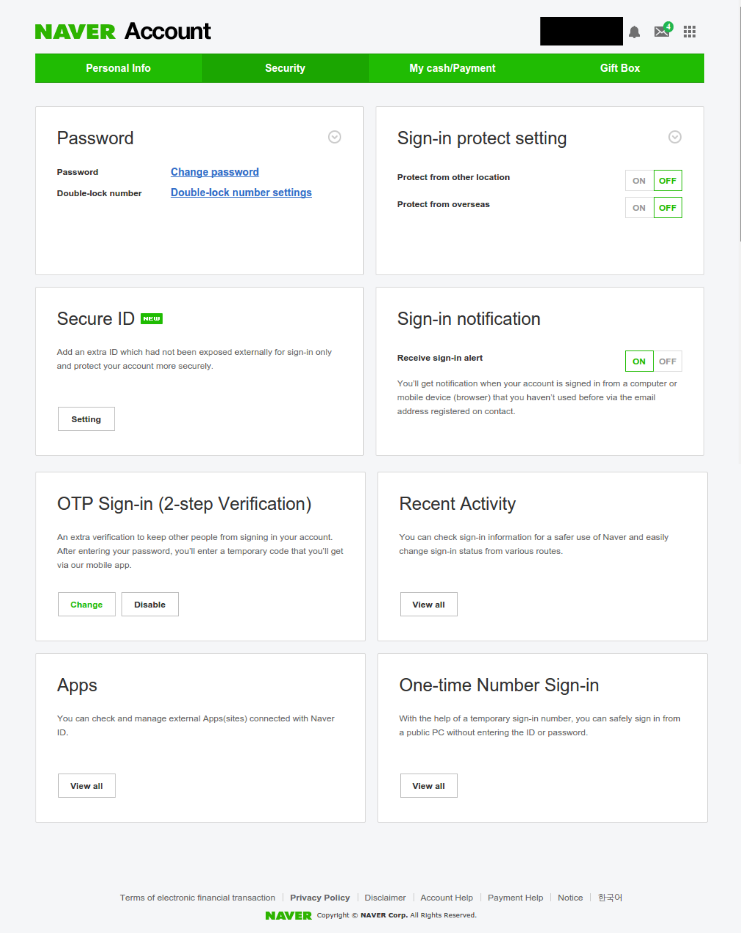
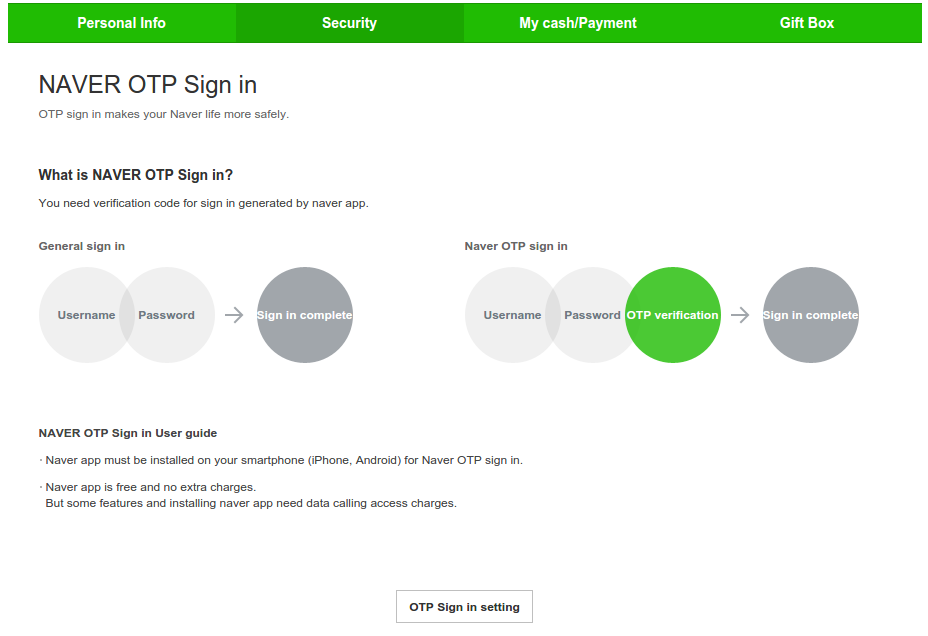
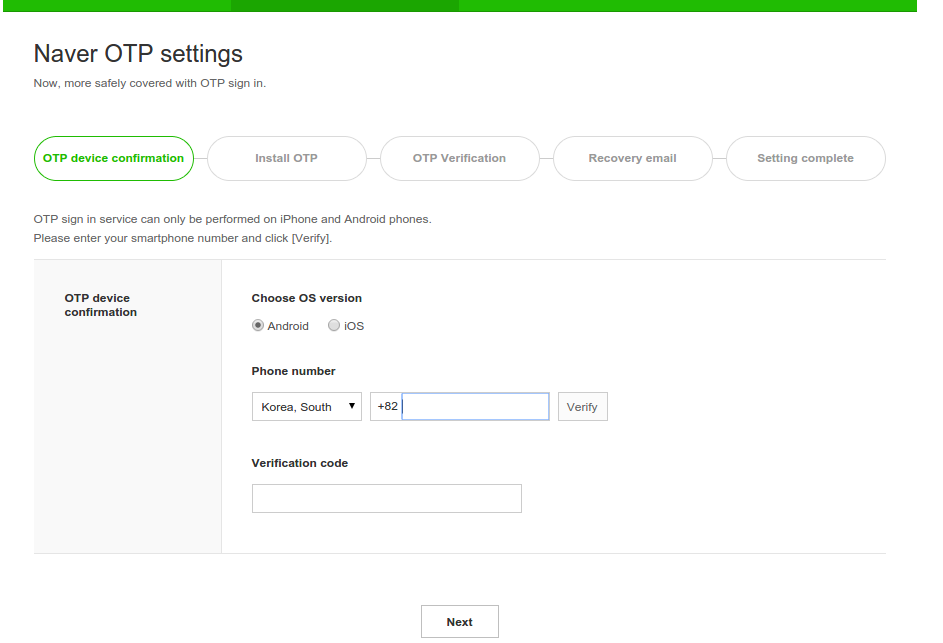
Part of the reason may be this:
The malicious application attacks a smartphone to steal personal information in the phone by pilfering authentication SMSs when the person uses an e-commerce payment service. [Korea Bizwire]
Note also here that the phone number you use here does not have to be the same number associated with your account (the number you gave when signing-up with Naver). For example, I didnt want to install the bloated Naver app, so here I used the number of a family member who does have the app. It worked just fine, though of course Ill need that persons phone when logging-in on an unknown/untrusted computer. Input the number, Naver will send you an SMS code, and input that code here.
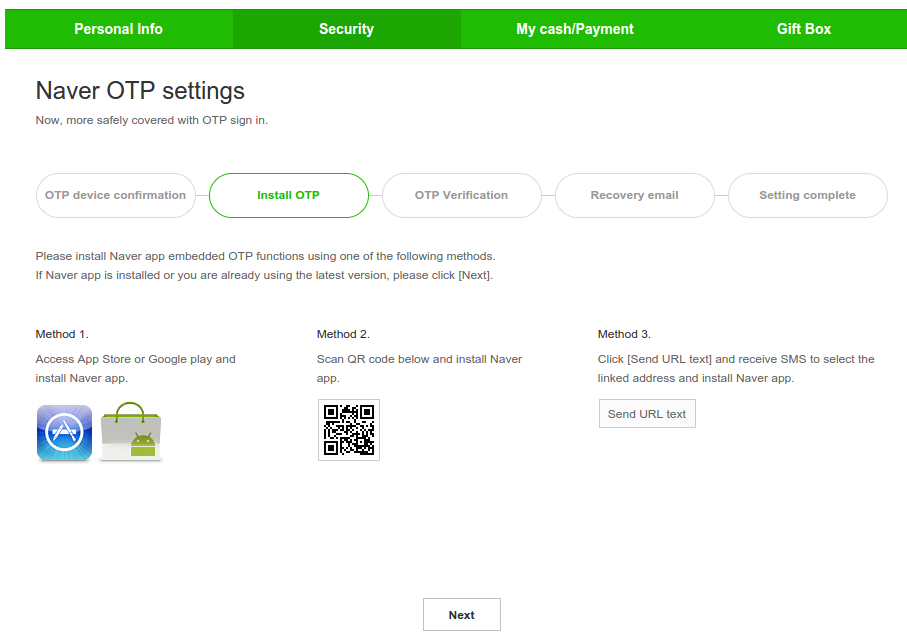
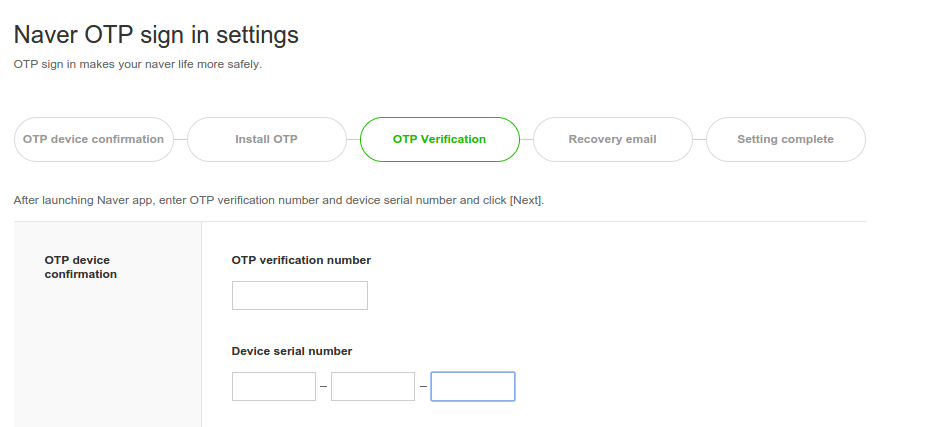
If youre not sure where to get this code, Ill show you now.
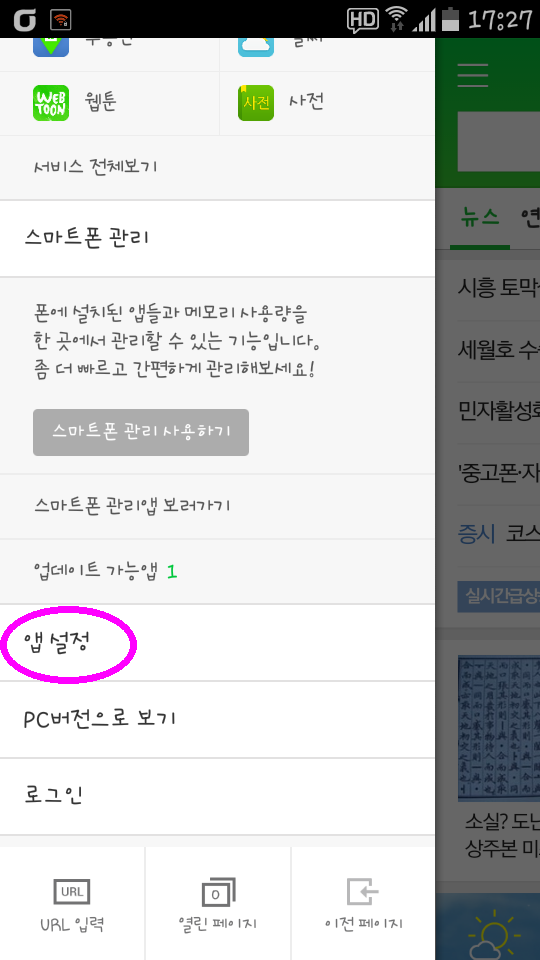
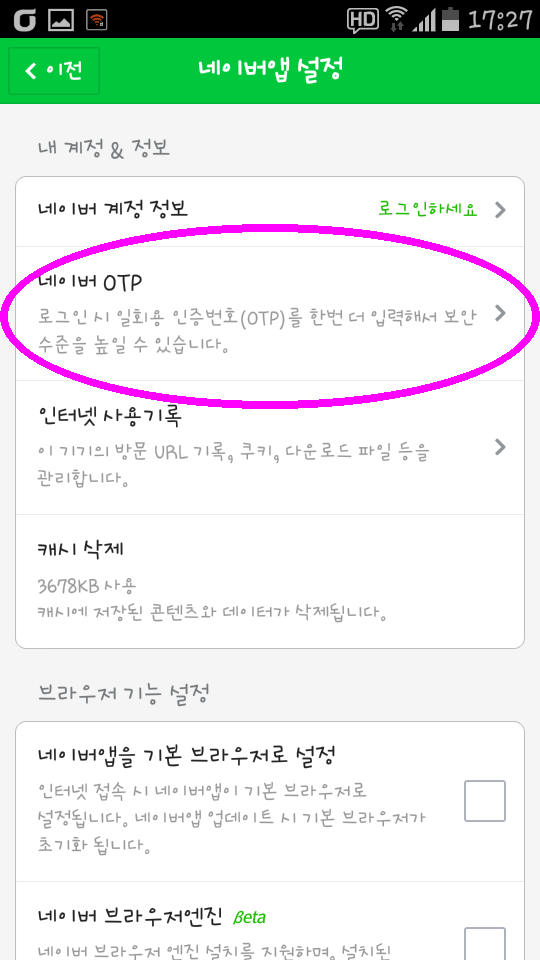
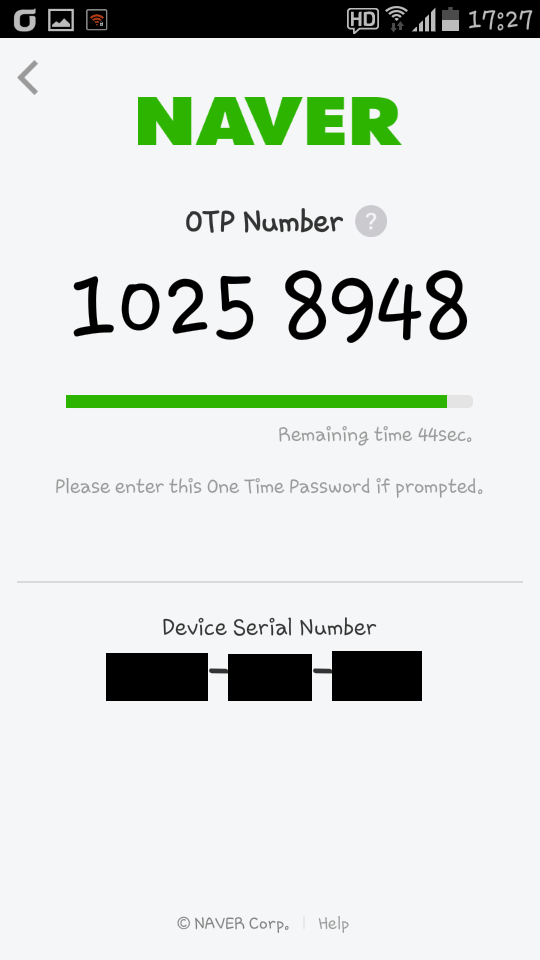
Now back to the set-up:
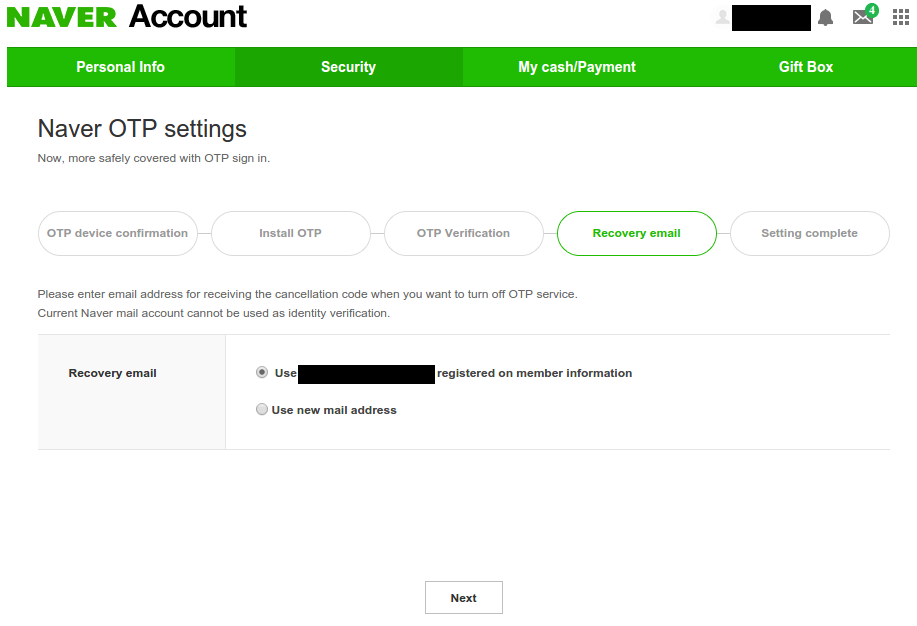
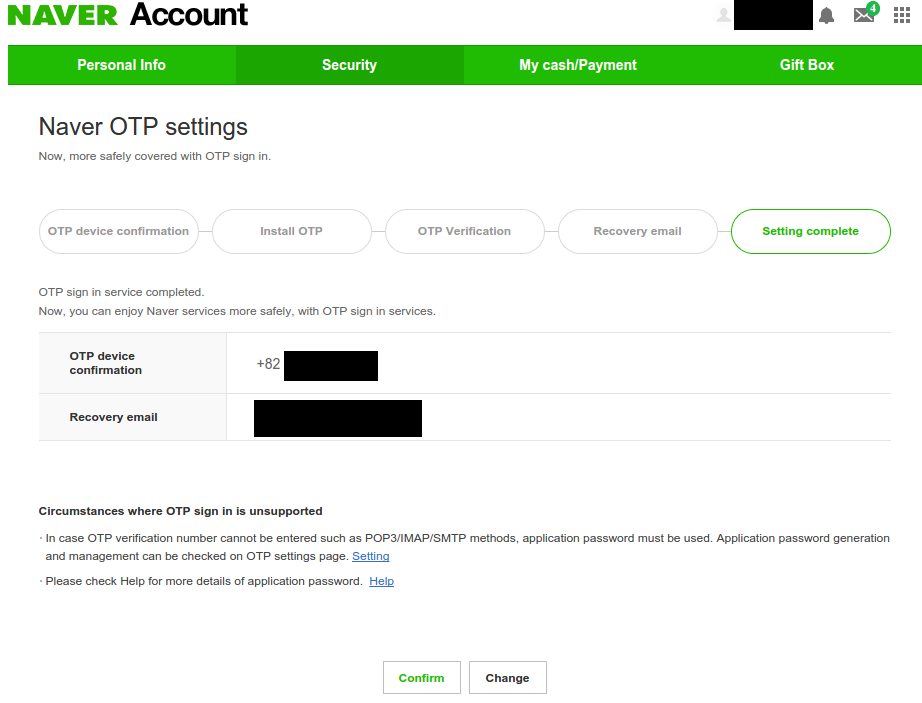
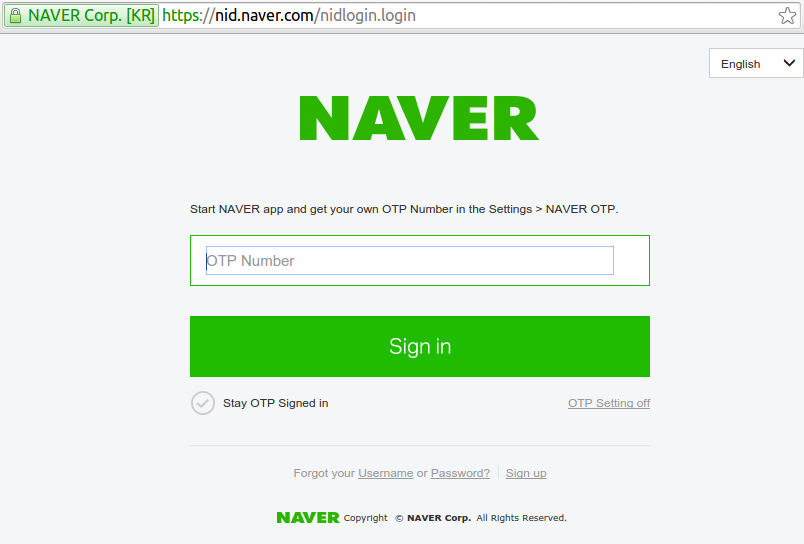
This could be really annoying to do every single time, so dont be a chump. If youre on your personal computer, just be sure to click the "Stay OTP Signed in" checkmark button before entering the code, and you wont need codes for that computer anymore. Set it, and forget it. Enjoy the peace of mind of knowing that no other computer will be able to log-in as you.
---
Hopefully you found this guide helpful. Though, of course, nearly the entire process was in English so really such a guide is a bit unnecessary. Personally, that makes me glad, that Naver expands their English offerings. Navers services really are useful and powerful; not just "Korean Google". I think they could see a lot of expansion and growth by supporting even just a few foreign languages (English / Chinese / Japanese). As I wrote before, Naver Dictionary and Naver Translate can be used fully in English. Lets hope more Naver services continue to become multi-lingual.
Subscribe to:
Posts (Atom)