Showing posts with label a. Show all posts
Showing posts with label a. Show all posts
Monday, August 29, 2016
A simple Google search
A simple Google search
Just a bit of light humor for those end-of-year blues.
Korea Times | Small cameras are watching you
Korea Times | Small cameras are watching you
A 28-year-old suspect, surnamed Choi, who has been arrested for allegedly having recorded videos of more than 100 naked women in water park shower rooms, said she used a subminiature camera imported from Taiwan for the job [...] And this is just one of many options available online.
A simple Google search can give anyone access to a slew of cameras that look like normal everyday items such as pens, car keys, lighters, watches and glasses among others.
Korea Times | Men arrested for allegedly making and selling meth
Song and Park said they traded meth online, using someone else’s phone numbers and bank accounts. They said they learned how to make the drug from foreign websites, over which Korean law enforcement has no control. In fact, such information can be easily found with a simple Google search.
Korea Times | Is Korea becoming a pot haven?
It is not just one or two websites. Potential buyers here can also purchase marijuana from overseas sellers directly and get it delivered with a simple Google search for "no prescription marijuana" or "marijuana delivery to South Korea." Moreover, there is abundant information about how to grow marijuana on various websites. As some drugs are legal in some countries, such information is generated legally, but people spread it to places where it is not legal, such as Korea.
Korea Times | Online overseas buys of illegal drugs on steep rise
In fact, with a simple Google search for "no prescription marijuana" or "marijuana delivery to South Korea," anyone can purchase them and get them delivered to with some risk. And that does not exclude minors.
Be careful out there folks. You never know what mischief a simple Google search can lead to.

Friday, August 26, 2016
Export Emails within a Date Range from Exchange 2010
Export Emails within a Date Range from Exchange 2010
Today I had to do this to assist with an email audit for a government agency. Below are the steps you need to follow to make this happen. The TechNet article leaves out a very important step that I have included for you below.
1. Open up the Exchange Management Shell and enter the following command: New-ManagementRoleAssignment –Role “Mailbox Import Export” –User "DOMAINUSERACCOUNT"
**NOTE: Now close the EMS and reopen it. You have to do this because the roles for the user logged in are loaded when the EMS is started.
2. Use this command to export your email date range and the location where you want to save it: New-MailboxExportRequest -Mailbox "SAMPLE USER" -ContentFilter {(Received -lt 01/01/2012) -and (Received -gt 03/31/2012)} -FilePath "SERVEREXPORTSSAMPLE_USER.pst"
Depending on the size of the users email you may get a file rather quickly or you may get a message from the EMC that the job is queued and will be filled when it is completed the search and export process.
What lead me here was the error "The Term New-MailboxExportRequest is not recognized as the name of a cmdlet, function, script file, or operable program".
The steps above will avoid this error and get you exactly what you need from the email box.
If you just want to dump the entire mailbox use this: New-MailboxExportRequest -Mailbox "SAMPLE USER" -FilePath "SERVEREXPORTSSAMPLE_USER.pst"
Arduino and Android using MIT app inventor 2 0 Learn in a day
Arduino and Android using MIT app inventor 2 0 Learn in a day
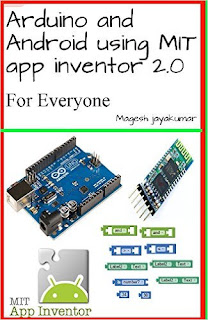

This book is about creating fun projects with arduino and android, this book will be very useful for people who are looking to create some cool projects and are not excellent with coding skills, This book will make anyone to create their own android and arduino project within few hours. This book will be very useful for children to create their own projects with their parents guidance. This book will cover the basics of MIT app inventor and this book needs user to have little experience with arduino on how to upload code to arduino and how to verify datas in serial monitor.
Wednesday, August 24, 2016
Beginning Samsung ARTIK A Guide for Developers
Beginning Samsung ARTIK A Guide for Developers


Samsungs announcement of the new ARTIK modules for IoT has generated tremendous interest in the developer market for wearable and other consumer or industrial devices. This book provides the perfect tutorial-based introduction to the ARTIK family of “Systems on Modules,” which integrate powerful microprocessors, memory, wireless connectivity, and enhanced security on to very small form factor boards.
Beginning Samsung ARTIK will help you understand which ARTIK modules to use for various applications, and how to produce code for them. This book goes beyond the information previously available online, efficiently guiding developers from initial setup of their development environment to product development and prototyping in no time. Helpful background insights into foundation technology is provided for beginners and useful reference information is included for more advanced developers.
Using examples provided by the author and working in a cross-platform environment, readers will quickly learn how to:
- Use terminal emulators to access the command line and talk to the device
- Establish Wi-Fi connectivity with a wireless network
- Upgrade the operating system and install additional software
- Bring up Eclipse IDE and create a cross-compiler toolchain on Mac OS X
- Use Arduino IDE with libArduino to cross-compile for the ARM processors in the ARTIK modules
- Use C language to access the ARTIK hardware via a file based API
- Use Node.js & Python inside the ARTIK module
- Integrate applications with the Samsung SAMI data aggregation hub
- Use Temboo to generate IoT software solutions that can be downloaded and compiled natively inside the ARTIK
- Debug applications with software and hardware probes
Tuesday, August 23, 2016
AdBlock a Firefox memory hog Not if you slim your filters!
AdBlock a Firefox memory hog Not if you slim your filters!
There are lots of articles out there talking about what a memory hog Adblock Plus is. And in my experience, especially on older machines, theyre right, if you leave it subscribed to a bunch of filter lists.
But have you ever actually looked at those lists? EasyList in particular is a huge collection of blocking rules for sites you probably will never visit. I use Firefox on a computer with only 1GB of RAM, and it really slowed me down.
So I took a look at my situation and realized: I mainly visit the same handful of sites over and over. Do I really need to waste that precious memory having Adblock check for ads from half-the-web?
So heres what I did:
- Installed Adblock Edge, because I can block whatever I want, and the custom filter lists I create with it sync over to my other Firefox computers
- Copied the filters from EasyList from sites I use frequently (a certain Tube site, a certain Centralized Comedy site, and, um, *ahem* a certain rodent site) and added them to my filter list.
- Spent a few days browsing in my usual habits, making note to spend just a minute or two on each site adding my own filters, by just right-clicking on the ads directly. The wildcard character comes in handy here.
- Done!
Whats the point of saying all this?
This:
 |
| Screenshot of Firefox memory usage. Highlighted portion is Adblock Edge ID. |
With five tabs open, Adblock Edge is taking up just half a megabyte of memory, and I have no ads visible. HALF A MEGABYTE, people.
They key here is numeric simplicity. Even a simple blocking filter like "*/ads/* removes tons of junk. I have maybe 200 active filters now, compared to the thousands that pile-up with those subscriptions.
Of course, I do use some simple filter subscriptions, like the Facebook Annoyances remover. Plus, there might be some sneaky beacons or trackers, so I have Ghostly and NoScript take care of that (you might also give Disconnect a try, though I found it interfered with sites often enough to be annoying.)
Id also given uBlock a try as a potential ABE replacement, and I liked it well-enough, and if you always use the same computer, go for it. But, at the moment, it has no syncing feature (and I respect that, for its goal of being as light-weight as possible). As Im "rolling my own" custom filters, I dont want to have to be blocking the same things twice over. ABEs use of Firefox Sync ensures that what I block at home carries over automatically to the work computer.
I know that some people just want simplicity, and using EasyList and the other filter subscriptions is great for that, especially for their auto-updating nature. I get that, I really do. Even I myself sometimes take a poke back at EasyList for updated YouTube ad-blocking strings. If I had the hardware power, maybe Id use the filter subscriptions too. But for people complaining about high memory usage, theres really no excuse for so much bloat. Slim it down and your browsing will speed up.
Building a Wireless Security Camera with Arduino
Building a Wireless Security Camera with Arduino


Imagine being able to watch whats going on in your home while you are away. What if you could build your own wireless security camera using the Arduino platform and some basic components?
In Building a Wireless Security Camera with Arduino, Marco Schwartz from the Open Home Automation website presents a straight to the point method to build your own security camera device with Arduino.
In this book, you will learn:
- How to configure an Arduino Yun & connect a USB camera to the board
- How to assemble the hardware of your camera
- How to make the camera stream local & cloud live video
- How to automatically save pictures of intruders on Dropbox
Sunday, August 21, 2016
Arduino Leonardo and Arduino Micro A Hands On Guide for Beginner
Arduino Leonardo and Arduino Micro A Hands On Guide for Beginner


Arduino Leonardo and Arduino/Genuino Micro are development boards which runs ATmega32U4. This book helps you to get started with Arduino Leonardo and Arduino/Genuino Micro development. Several case samples are provided to accelerate your learning. The following is highlight topics in this books:
* Preparing Development Environment
* Setting Up Arduino Leonardo and Arduino Micro
* Writing and Reading Digital Data
* PWM and Analog Input
* Working with I2C
* Working with SPI
* Accessing EEPROM
* Arduino Networking
* Keyboard and Mouse HID
Wednesday, August 17, 2016
Arduino A Technical Reference A Handbook for Technicians Engineers and Makers In a Nutshell
Arduino A Technical Reference A Handbook for Technicians Engineers and Makers In a Nutshell


Rather than yet another project-based workbook, Arduino: A Technical Reference is a reference and handbook that thoroughly describes the electrical and performance aspects of an Arduino board and its software.
This book brings together in one place all the information you need to get something done with Arduino. It will save you from endless web searches and digging through translations of datasheets or notes in project-based texts to find the information that corresponds to your own particular setup and question.
Reference features include pinout diagrams, a discussion of the AVR microcontrollers used with Arduino boards, a look under the hood at the firmware and run-time libraries that make the Arduino unique, and extensive coverage of the various shields and add-on sensors that can be used with an Arduino. One chapter is devoted to creating a new shield from scratch.
The book wraps up with detailed descriptions of three different projects: a programmable signal generator, a "smart" thermostat, and a programmable launch sequencer for model rockets. Each project highlights one or more topics that can be applied to other applications.
Monday, August 15, 2016
Building a Home Security System with Arduino
Building a Home Security System with Arduino


About This Book
- Learn what a security system is, how it works and create one for yourself
- Develop a security system by setting up security cameras and motion detector systems
- Manage and analyze all the data collected by the sensors from the security system, using a graphical application
This book is for novice programmers and hobbyists who want to understand how Arduino can be used to program a home security system as well as to those who want to delve deeper into the world of Arduino.
What You Will Learn
- Run cables and electricity to support home security infrastructure
- Connect Arduino to your programming environment
- Learn to interact with output devices – alarms, locks, shutters
- Understand different parts of electronics circuit (MOSFET, resistor, capacitor)
- Integrate home monitoring and security notifications with monitoring systems
- Use logical level shifter with Arduino to send and receive data to and from Raspberry PI
Arduino is an open source micro-controller built on a single circuit board that is capable of receiving sensory input from the environment and controlling interactive physical objects. It is also a development environment that allows the writing of software to the board, and is programmed in the Arduino programming language. It is used for a variety of different purposes and projects, from simple projects such as building a thermostat, to more advanced ones such as robotics, web servers, seismographs, home security systems and synthesizers.
This book will demonstrate how the Arduino can be used to develop a highly connected home security system by mobilizing a network of sensors which can feed alerts back to an Arduino when alarms are triggered. You will know the current state of security systems, well supported by the designs that fit best for your environment. Also, we will see some current technologies such as NFC, Wi-Fi and Bluetooth, and will finally create a complete web interface that will allow us to remotely manage our system, and even send daily bulletins with the summary of activity.
Towards the end, well develop a wireless home security system by setting up security cameras and motion detectors (door and gate trips, temperature sensors). We will then set up a centralized remote access hub (powered by the Arduino) that allows sensors to connect to the wireless home network that can be viewed and interacted by the user.
Style and approach
A step-by-step guide with numerous examples focusing on providing the practical skills required to build home security applications using Arduino.
Auto add a map to Blogger posts
Auto add a map to Blogger posts
Heres an incredibly easy way to automatically add a fully functional small embedded Google Map to any of your Blogger blog posts.
Add this code to your template once, and automatically any blog post that you geotag will have a small embedded map featuring that location. Since its a template edit, it will work automatically for any post you geotagged, past or present. This is really pretty amazing, as I know a lot of people, from travelers to businesses have wanted to do this.
Heres an example of what it looks like. All I did was geotag that post at Gangnam station, and a convenient map automatically is displayed. Please ignore the fruity theme there, I was testing new templates.
Just add the following code to your Blogger template. Wherever you add it, thats where the map will appear in the post. In the screenshot above, I edited the size to make it a bit smaller and I added the code just below the sharing buttons, but of course you could add it just below the <post-footer>, near the timestamp, inside the post itself, whatever. Id suggest only adding it to the desktop part of the template. If your location stamp isnt showing up as a text link in your blogs mobile version, see how to enable it in my other post: [Displaying your Blogger posts location tag on mobile templates]
Add this code to your template once, and automatically any blog post that you geotag will have a small embedded map featuring that location. Since its a template edit, it will work automatically for any post you geotagged, past or present. This is really pretty amazing, as I know a lot of people, from travelers to businesses have wanted to do this.
Example map auto-embedded in a Blogger post
Heres an example of what it looks like. All I did was geotag that post at Gangnam station, and a convenient map automatically is displayed. Please ignore the fruity theme there, I was testing new templates.
 |
| Automatically embedded post map, based on posts geotag |
Just add the following code to your Blogger template. Wherever you add it, thats where the map will appear in the post. In the screenshot above, I edited the size to make it a bit smaller and I added the code just below the sharing buttons, but of course you could add it just below the <post-footer>, near the timestamp, inside the post itself, whatever. Id suggest only adding it to the desktop part of the template. If your location stamp isnt showing up as a text link in your blogs mobile version, see how to enable it in my other post: [Displaying your Blogger posts location tag on mobile templates]
Code to add to your Blogger template
<b:if cond=data:top.showLocation>Full credit for this goes to the tip site Blogger4Bloggers, which seriously is a treasure trove of neat tips like this. If you use Blogger definitely check them out and subscribe. They have some amazing stuff there.
<b:if cond=data:post.location>
<div class=post-location>
<iframe expr_src=data:post.location.mapsUrl + "&amp;ie=UTF8&amp;hnear=" + data:post.location.name + "&amp;hq=&amp;t=h&amp;output=embed" frameborder=0 height=350 marginheight=0 marginwidth=0 scrolling=no width=425/><br/>
<small style=color: #0000FF;>
<span><b><data:postLocationLabel/></b> <span class=notranslate><data:post.location.name/></span></span><br/>
<span><a expr_href=data:post.location.mapsUrl style=color: #0000FF; target=_blank>GoogleMaps</a> |
<a expr_href="https://plus.google.com/u/0/local/" + data:post.location.name style=color: #0000FF; target=_blank>GooglePlus Local</a></span>
</small>
</div>
</b:if>
</b:if>
[Source: Add Google Maps automatically to blogger posts]
Geotagging your posts
Just a reminder that to make the map appear, you need to geotag your blog post using the "Location" setting in the sidebar of the post editor. The Blogger mobile app should also do this, though for some reason mine has started giving a "Location not available". Not sure if thats a Blogger issue or just me. Anyway it works great from the desktop editor.
Case studies for using this
I can imagine a few situations where this would be very convenient.
- Small business that does installations in a local area, and writes up a blog post for each to feature the work. This would save them having to manually embed maps to the locations, which would be a pain in the ass.
- A tourist or travel writer keeping a travel blog, to easily show where he was at each stop of his tour.
- An amateur food critic can easily show the locations of restaurants hes dined at.
- A hiking club could add blog posts for specific trips, posting photos and details of the destination, and automatically have a map of the destination embedded.
Im sure there are lots more cases where this would be convenient. Like I said it beats the hell out of doing this manually, which I know some people do.
Other Map types
If youre into this, Ive got a couple of other map posts, including how to display a large map that shows the locations of all your geotagged blog posts, and the same but in a sidebar widget.
And all my map-related posts are here.
Thanks for reading, and happy mapping.
Wednesday, August 10, 2016
Build A Life Size Phone Controlled BB8 Droid Full DIY Tutorial
Build A Life Size Phone Controlled BB8 Droid Full DIY Tutorial
This video show hoe to build a real working Starwars BB8 droid by only using household materials and Arduino! (No 3D Printers! No CNCs! No Mills!)
Full-Tutorial (w/Downloads):
http://www.instructables.com/id/DIY-Life-Size-Phone-Controlled-BB8-Droid/
Tuesday, August 9, 2016
Display your Blogger posts on a Google Map
Display your Blogger posts on a Google Map
In this post, well make a full-size Google Map that contains all the location-tagged posts from your Blogger feed. It will display full entries on the map.
If youre looking for a more simple map page that links to the posts, or for putting a map in your blogs sidebar as a widget, please see my other post.
UPDATE 2015-09
I edited the HTML file code below. Readers on Twitter alerted me to the fact that the RSS URL for blogs only goes so far back in time, meaning many older location-tagged posts were missing from the map. Ive replaced that URL format with another that seems to stretch all the way back.
---
I keep a travel blog for friends and family, and usually tag those Blogger posts with my location. Usually, this just adds a location tag to the bottom of the post, with a link you can click to see that spot on a map. Pretty boring. But heres a nice way to plot all your geocoded (location-tagged) Blogspot blog posts onto a single Google Map. Great way to revisit old posts and visually, geographically see where and when you were.
For example, here is the map with location-tagged posts from this blog. Just click each one to view the corresponding entry in its entirety. All of the entries appear similarly.
 |
| Screenshot of my Blog Map |
Step 1 - Edit the code
Copy the code below and paste it into a plain-text document.<!DOCTYPE html>
<html>
<head>
<meta name="viewport" content="initial-scale=1.0, user-scalable=no">
<meta charset="utf-8">
<title>GeoRSS Layers</title>
<style>
html, body, #map-canvas {
height: 100%;
margin: 0;
padding: 0;
}
</style>
<script src="https://maps.googleapis.com/maps/api/js?v=3.exp&signed_in=true"></script>
<script>
function initialize() {
var myLatlng = new google.maps.LatLng(49.496675,-102.65625);
var mapOptions = {
zoom: 4,
center: myLatlng
}
var map = new google.maps.Map(document.getElementById(map-canvas), mapOptions);
var georssLayer = new google.maps.KmlLayer({
url: http://www.blogger.com/feeds/blogId/posts/default?max=500&max-results=500
});
georssLayer.setMap(map);
}
google.maps.event.addDomListener(window, load, initialize);
</script>
</head>
<body>
<div id="map-canvas"></div>
</body>
</html>
The bold URL above needs to be replaced with whatever GeoRSS enabed feed you want to use.
Luckily, Blogger blogs already have this feature enabled. Thanks, Google. So if youre using Blogger, youll just need your blogId number. You can get this by simply logging into Blogger and visiting your blogs posts lists. Look up in the URL and youll see something like "blogID=48574832938473847". Copy this number and replace "blogId" in the code above with this number.
Save it as an HTML file.
Next, you need to replace blogId in that URL with your own Blogger blog ID number.
The important thing is that the file must be accessible directly, so upload it to your own webserver, or your Dropbox public folder, or even to Google Drive. After youve uploaded the file to Google Drive, get its "shareable link". But were not done just yet. That shareable link will only open the file in the Google Drive viewer; not open the file directly. To do that, we need to edit the URL a bit. Copy just the number from your shared URL, and tack it on to the end of this string:
http://googledrive.com/host/xxxxxxxxxxxxxxx
That should be it! Youve now got a direct link to your map file.
Now you could just, for example, have a link on your blog, perhaps as a "Page" on your blog, that leads to that URL, as that is now your Blog Entries Map. But you might also want to embed the map on a page on your blog. In that case:
With Google+ all but dead, I hope Google gives some more love to Blogger. Its a bit bothersome to have to depend on these workarounds. This is why I actually prefer Naver Blogs. Its very easy to add a post map. Just wish they had an English interface.
Luckily, Blogger blogs already have this feature enabled. Thanks, Google. So if youre using Blogger, youll just need your blogId number. You can get this by simply logging into Blogger and visiting your blogs posts lists. Look up in the URL and youll see something like "blogID=48574832938473847". Copy this number and replace "blogId" in the code above with this number.
Save it as an HTML file.
Next, you need to replace blogId in that URL with your own Blogger blog ID number.
Step 2 - Upload the File
Now you need a host for this HTML file. Sadly, I dont think you can just paste this code into a Blogger entry page. Maybe you could edit the template but Im not a coding genius here.The important thing is that the file must be accessible directly, so upload it to your own webserver, or your Dropbox public folder, or even to Google Drive. After youve uploaded the file to Google Drive, get its "shareable link". But were not done just yet. That shareable link will only open the file in the Google Drive viewer; not open the file directly. To do that, we need to edit the URL a bit. Copy just the number from your shared URL, and tack it on to the end of this string:
http://googledrive.com/host/xxxxxxxxxxxxxxx
That should be it! Youve now got a direct link to your map file.
Now you could just, for example, have a link on your blog, perhaps as a "Page" on your blog, that leads to that URL, as that is now your Blog Entries Map. But you might also want to embed the map on a page on your blog. In that case:
Step 3 - Embed (optional)
Just create a new Blogger page, switch to HTML editing, and paste this code, changing the URL to your files location:<iframe height="400px" width="100%" frameBorder="0" scrolling="no"
src="http://www.yourhost.com/yourfile.html">
</iframe>
With Google+ all but dead, I hope Google gives some more love to Blogger. Its a bit bothersome to have to depend on these workarounds. This is why I actually prefer Naver Blogs. Its very easy to add a post map. Just wish they had an English interface.
Sunday, August 7, 2016
A lesson for Italy
A lesson for Italy
Zapping on TV last night I switched on MTV and Fabio Volo in his program "Italo Americano" was visiting Google headquarters in Mountain View, CA.
Wow: I was truly amazed how fantastic Google is!
I searched on youtube "work google" and found a lot of videos about how is working in Google (best company to work for in the U.S.A.... and probably in the world).
Heres just an example:
No need to say that in Italy we are very far from this mentality (which is typically American) but I think THIS is a lesson we should start to learn if we want things to change.
Facendo zapping laltra sera sono capitato su MTV dove stavano trasmettendo il programma di Fabio Volo "Italo Americano". Fabio stava facendo visita al quartier generale di Google in Mountain View, CA.
Caspita: sono veramente rimasto colpito di quanto è stupendo lavorare per Google!
Ho cercato su youtube "work google" e ovviamente ho trovato un sacco di video su comè lavorare in Google (la miglior compagni per cui lavorare negli U.S.A.... e probabilmente nel mondo).
Non cè bisogno di dire che in italia siamo molto lontani da questa mentalità (tipicamente Americana) ma credo che QUESTA sia una lezione che dovremmo imparare se vogliamo che qualcosa cambi.
Saturday, August 6, 2016
Arduino Uno A Hands On Guide for Beginner
Arduino Uno A Hands On Guide for Beginner


Arduino board is a popular board for embedded development. This book helps you to get started with Arduino Uno development. Several scenario samples are provided to accelerate your learning process. The following is highlight topics:
* Preparing Development Environment
* Setting Up Arduino Uno
* Writing and Reading Digital Data
* Serial Communication (UART)
* PWM and Analog Input
* Working with I2C
* Working with SPI
* Accessing EEPROM
* Arduino Networking
Friday, August 5, 2016
A dying breed
A dying breed
I went back to Scotland last week. I was in such a rush, I forgot to lift my Diana or my Holga. I had originally planned to take a bunch of photos in my favourite places, but that didnt happen.
The camera shop I loved has now disappeared, consumed by yet another hairdressers or bookies or god knows what. This makes me sad. I would have been foolish to expect a niche service to exist in a town centre that has been dying for over a decade now. Its a depressing place. London, in contrast, is a bubble.
Anyway......Im looking for another Polaroid :)

Blogger Map widget for showing geotagged blog posts on a map
Blogger Map widget for showing geotagged blog posts on a map
This post will show you how to add a side-bar widget to your Blogger/Blogspot blog. The map will display pushpins at each of your location-tagged posts locations. Click the pins, and a small card appears with the title, date, and a link to the post.
If youd like the cards/pins to show the full post entries, click here for my other post.
UPDATED June 2015
You can embed the map in a page too, not just as a widget.
Location-tagged Blogger posts
I like using Blogger, and I always geotag the posts on my travel blog using the "Location" setting in the right-hand side of the Blogger compose page.
 |
| Bloggers "Location" tag feature |
This adds a nice "Location" line under my posts that displays the address of my blog posts geotag, and clicking it opens a Google Map of that location.
Until today, I thought that was all you could do with this feature, which seemed a bit disappointing. Ideally, I was hoping there was a way to display, on one single map, the locations of all my blog posts. Sort of like how you can visualize all your Foursquare checkins with its KML feed, I wanted to treat my Blogger blog posts as "Check-ins" and see where all Ive been.
It turns out that this is not only possible, but also very easy to do. The technology behind it seems ancient (2008) but I just tested it out (2014) and it works beautifully!
Adding the widget from the original source (easy)
The most simple way is just to follow the directions from this old "Blogger in Draft" post:
- Go to Bloggers "Layout" editing section
- Add a new Gadget
- Add by URL
- Paste this URL in the box:
http://blogmap-gadget.googlecode.com/svn/trunk/blogmap.xml - Save it and edit the gadget, using your blogs feed URL as the source
(http://yourblog.blogger.com/feeds/posts/default)
Adding the widget from your own source (optional)
The widget source-code is coming from a very old "Blogger in Draft" post, and you might worry that it could be deleted or lost, especially since this seems to be the only location on the net for it. Ill repost it here, so that you could potentially self-host the file if need-be.
In that case:
- Copy the code from the box below and save it in a plain text document, giving it the extension .xml
- Upload the document to a place that allows public full access to the document. Dont paste it into a blog post. It has to be accessible as text. Google Sites sometimes works, as can your Dropbox Public folder, or any other file hosting site that lets you link directly to the file. Google Drive can also do this.
- Use this new URL, the location of the file you just uploaded, as the URL when you add the widget via the "Adding by URL" option.
<?xml version="1.0" encoding="UTF-8" ?> <Module> <ModulePrefs title="Blog Map" description="Display blog posts on a map." height="250" author="Brian Ngo" author_email="briancse+blogmap@gmail.com"> <Require feature="dynamic-height" /> <Require feature="setprefs" /> </ModulePrefs> <UserPref name="feedUrl" display_name="Blogs GeoRSS feed URL. Save as empty to reset." /> <UserPref name="height" display_name="Height in pixels" required="true" default_value="250" /> <Content type="html"> <![CDATA[ <style type="text/css"> .inputBox { border-color: #777777 #AAAAAA #AAAAAA #777777; border-style: solid; border-width: 1px; padding: 2px; width: 100%; } .inputBox-hint { border-color: #777777 #AAAAAA #AAAAAA #777777; border-style: solid; border-width: 1px; padding: 2px; width: 96%; color: #999; font-style: italic; } .statusMsg { font-size: small; color: #333; font-style: italic; } .statusMsg-error { font-size: small; color: red; font-weight: bold; } </style> <script src="http://maps.google.com/maps?file=api&v=2.x&key=ABQIAAAAn138JcpDQexRxBMx-GYAehTZqGWfQErE9pT-IucjscazSdFnjBS4hjjTEOYU89NegWNS5Bv9cZZO8g" type="text/javascript"></script> <div id="instructions" style="display: none; font-size: 14px;"> <p> To display your blog posts on a map, enter your <b>blogs URL</b> below. Alternatively, you can also enter your blogs <b>RSS or Atom feed URL</b>. </p> <input type="text" id="feedUrl" name="feedUrl" class="inputBox-hint" value="Example: http://your-blog-url.blogspot.com" /> <div style="padding: 5px 10px 0 0;"> <input type="button" id="okButton" name="okButton" value="Fetch my blog!" /> </div> <div id="statusMsg" class="statusMsg"></div> </div> <div id="map"></div> <script type="text/javascript"> var PREFS = new gadgets.Prefs(); var MAP = null; var WIDTH = gadgets.window.getViewportDimensions().width; var HEIGHT = PREFS.getInt(height); var FEEDURL = PREFS.getString(feedUrl); var XML = null; var BLOGSPOT_REGEX = new RegExp(blogspot.com/?$); var inputBoxActivated = false; function init() { gadgets.window.adjustHeight(HEIGHT); var container = document.getElementById(map); container.style.height = HEIGHT + px; container.style.width = WIDTH + px; if (!FEEDURL) { document.getElementById(instructions).style.display = ; document.getElementById(feedUrl).onclick = activateInput; document.getElementById(okButton).onclick = validateFeedUrl; } else { fetchFeed(); } } function activateInput() { if (!inputBoxActivated) { document.getElementById(feedUrl).className = inputBox; document.getElementById(feedUrl).value = ; inputBoxActivated = true; } } function validateFeedUrl() { document.getElementById(statusMsg).className = statusMsg; document.getElementById(statusMsg).innerHTML = Validating feed...; var feedUrl = maybeFixUrl(document.getElementById(feedUrl).value); var params = {}; params[gadgets.io.RequestParameters.CONTENT_TYPE] = gadgets.io.ContentType.FEED; params[gadgets.io.RequestParameters.NUM_ENTRIES] = 1; params[gadgets.io.RequestParameters.GET_SUMMARIES] = false; gadgets.io.makeRequest(feedUrl, handleValidateFeed, params); } /** * Will attempt to detect a blogspot.com url without the feed suffix * (e.g., http://ginternfoodblog.blogspot.com/). If detected, adds * the feed suffix ("/feeds/posts/default"). Also, adds an http:// * protocol if one isnt present. */ function maybeFixUrl(url) { // trim whitepsace. url = url.replace(/^s*(S*(s+S+)*)s*$/, "$1"); // test blogspot url fix if (BLOGSPOT_REGEX.test(url)) { if (url[url.length - 1] != /) { url += /; } url += feeds/posts/default; } // test http protocol fix if (url.indexOf(http://) != 0) { url = http:// + url; } return url; } function handleValidateFeed(response) { if (response && response.data && response.data.Entry) { var feedUrl = response.data.URL; PREFS.set(feedUrl, feedUrl); FEEDURL = feedUrl; fetchFeed(); } else { document.getElementById(statusMsg).className = statusMsg-error; document.getElementById(statusMsg).innerHTML = Couldn find feed. Is the URL correct?; } } function fetchFeed() { var params = {}; params[gadgets.io.RequestParameters.CONTENT_TYPE] = gadgets.io.ContentType.DOM; params[gadgets.io.RequestParameters.METHOD] = gadgets.io.MethodType.GET; gadgets.io.makeRequest(FEEDURL, handleFetchFeed, params); } function handleFetchFeed(response) { document.getElementById(instructions).style.display = none; var data = response.data; var points = data.getElementsByTagName(georss:point); // We werent able to get any georss:point nodes, this might be a // Webkit browser and just wants "point" as the tag name. if (points.length == 0) { points = data.getElementsByTagName(point); } var geoposts = []; for (var i = 0; i < points.length; i++) { var latlngPair = points[i].firstChild.nodeValue.split( ); var title = points[i].parentNode.getElementsByTagName(title)[0] .firstChild.nodeValue; var date; var link; var pubDate = points[i].parentNode.getElementsByTagName(pubDate); if (pubDate.length > 0) { // This is an RSS feed. var tempDate = new Date(); tempDate.setTime(Date.parse(pubDate[0].firstChild.nodeValue)); date = tempDate.toLocaleDateString(); link = points[i].parentNode.getElementsByTagName(link)[0] .firstChild.nodeValue; } else { // This is an Atom feed. date = points[i].parentNode.getElementsByTagName(updated)[0] .firstChild.nodeValue.substring(0, 10); var links = points[i].parentNode.getElementsByTagName(link); for (var n = 0; n < links.length; n++) { if (links[n].getAttribute(rel) == alternate) { link = links[n].getAttribute(href); break; } } } geoposts.push({ title: title, point: new google.maps.LatLng(latlngPair[0], latlngPair[1]), date: date, link: link }); } createMap(geoposts); } // Doing two loops here... non-ideal.. too tired to optimize. function createMap(geodata) { var bounds = new google.maps.LatLngBounds(); for (var i = 0; i < geodata.length; i++) { bounds.extend(geodata[i].point); } MAP = new google.maps.Map2(document.getElementById(map)); MAP.setCenter(bounds.getCenter(), MAP.getBoundsZoomLevel(bounds)); MAP.addControl(new google.maps.SmallZoomControl()); for (var i = 0; i < geodata.length; i++) { var marker = new google.maps.Marker(geodata[i].point, { title: geodata[i].title }); MAP.addOverlay(marker); var infoHtml = <div style="font-size: small"> + <b> + geodata[i].title + </b> + <div style="color: #666;"> + Posted on + geodata[i].date + </div> + <div style="font-size: small"> + <a href=" + geodata[i].link + " target="_blank"> + View post</a></div> + </div>; marker.bindInfoWindowHtml(infoHtml); } } gadgets.util.registerOnLoadHandler(init); </script> ]]> </Content> </Module>
Blog Map widget in action
Here is a screenshot of this beautiful, underutilized, and probably forgotten feature. The map that is now displayed in your blogs sidebar shows pins at your posts geotagged locations. You can click the pins for a small pop-up dialog that contains a link to the blog post that was tagged at that location.
 |
| Blog Map sidebar widget |
Embedding the map in a Blogger Page
You dont have to just use this as a side-bar widget. The map can also be embedded on one of your Blogger pages (it works better on a "page" not a "post").
This is very easy. Just create a new Blogger page, switch to HTML editing, and paste this code, changing the URL for your blog:
<iframe frameborder="0" height="250" id="map" name="map" src="//www-blogger-opensocial.googleusercontent.com/gadgets/ifr?url=http://blogmap-gadget.googlecode.com/svn/trunk/blogmap.xml&container=blogger&view=default&lang=en&country=ALL&sanitize=0&v=38841e006da8e2dd&libs=core:dynamic-height:setprefs&parent=http://testofpyojina2.blogspot.com/&up_feedUrl=http://testofpyojina2.blogspot.com/feeds/posts/default&up_height=250&mid=1#up_height=250&up_feedUrl=http://testofpyojina2.blogspot.com/feeds/posts/default&st=e%3DAFlCd0Vr5Ehr8RmECOHLq0S%252F20Y33QUXiflbjKfRMJKtj9KwkD9YS3Uq3Xezr3ffRqOsHwYznsMMLJL1lzdH2mGi20gGUDm6kZZjf5a%252F1QQDC%252B%252B6NPHmoRqokx%252BjvN6pekTyBhptzGC9%26c%3Dblogger&rpctoken=2160341050058157284" style="display: block; width: 100%;"></iframe>
It does not seem to work if your blogs feed is redirected through Feedburner, and the script can sometimes hang if you have too many entries. If anyone has any solution to these issues, let me know in the comments!
If you use Blogger, please add the widget to your Blogger blog, and demonstrate its usefulness to the masses! Id love for this wonderful bit of code to be revived, and for Google to be more active in supporting Blogger. In the crazy world of Google+ checkins and Swarm checkins and Facebook checkins and all the other checkin services, its nice to see location-tags on Blogger still being supported. Its a great way to revisit old memories and see your blog journey in a new way.
Thursday, August 4, 2016
Getting Started with 3D Printing A Hands on Guide to the Hardware Software and Services Behind the New Manufacturing Revolution
Getting Started with 3D Printing A Hands on Guide to the Hardware Software and Services Behind the New Manufacturing Revolution


Make: Getting Started with 3D Printing is a practical, informative, and inspiring book that guides readers step-by-step through understanding how this new technology will empower them to take full advantage of all it has to offer. The book includes fundamental topics such as a short history of 3D printing, the best hardware and software choices for consumers, hands-on tutorial exercises the reader can practice for free at home, and how to apply 3D printing in the readers life and profession. For every maker or would-be maker who is interested, or is confused, or who wants to get started in 3D printing today, this book offers methodical information that can be read, digested, and put into practice immediately!
Wednesday, August 3, 2016
Exchange 2010 Error A reboot from a previous installation is pending
Exchange 2010 Error A reboot from a previous installation is pending
If you are seeing this error while trying to apply an Exchange SP or RU and you have restarted heres a quick fix for it:
**MAKE SURE YOU RESTART FIRST JUST TO MAKE SURE IT IS NOT CLEARING**
Delete the below key from the registry:
HKLMSYSTEMCurrentControlSetControlSessionManagerPendingFileRenameOperations
HKLMSYSTEMCurrentControlSetControlSessionManagerPendingFileRenameOperations
After this you will be able to continue your service pack install.
Good luck.
Saturday, July 30, 2016
BBC micro bit a pocket sized codeable computer that allows children to get creative with technology
BBC micro bit a pocket sized codeable computer that allows children to get creative with technology
Thursday, July 28, 2016
Feedly vs Inoreader Part 5 Google News is a pro feature
Feedly vs Inoreader Part 5 Google News is a pro feature
 Here is an addition to my series (which even I thought was finished) on Feedly vs Inoreader as the RSS reader of choice. I look for areas in which one objectively excels over the other. This time I get all high and mighty about what RSS means, and why I see one reader moving in a direction I dont like. This is Part 5. For more, see this series Part 1, Part 2, Part 3, and Part 4 if youre interested.
 Google News: a pro feature?
If you have a feedly Pro or feedly Team account, you can use the premium Power Search function to create a Google News feed within feedly.
[Feedly Blog | Follow a Google News Keyword Alert in Feedly]
Seriously guys? Youre offering a completely free public Google service as a "Pro" feature?
Google News: use its RSS feeds for free, anywhere
Google offers those RSS news feeds free, and you can add them to any feed reader, whether youre a pro or free user, using Googles own instructions here. Its literally as easy as searching on Google News and clicking the RSS feed link at the bottom.
You can use and subscribe to both Google News section feeds and search results feeds. You can find Google News Feeds by searching for the orange RSS icon at the bottom of any Google News page.
By clicking this RSS icon, you can get a feed for any Google News section. For instance, while youre on the Business page, clicking the RSS icon at the bottom of the page will give you a feed of business news.
You can also get a feed for searches you do on Google News. First perform a search on Google News, then simply use the RSS icon at the bottom of the search results page to generate the feed.
[Google News Help | Using Google News RSS Feeds]
And yes, Ive tried, you can use search operators to get insanely customized feeds, even feeds from sites that dont even provide actual RSS feeds (Im looking at you, AllKpop). These feeds are indeed handy, whatever industry youre in. Inoreader already supports (and has done so for a while now) a very convenient way to add Google News feeds from right inside its main search bar, for free, for everyone. As it should be. Google provides this service, not the Feedly cloud. It seems obscene to limit it to "pro" users.
Why this matters
I get that Feedly did and does a lot for RSS, and that they need paying customers to survive. But the whole foundation of their product is freely, openly distributed RSS content. Making Google News a "pro" feature essentially is a charge for that free, open content. Imagine if following certain people on Twitter required a Twitter Pro account. Or tweets linking to certain sites required a Pro account to see. Thats crazy. The content is open and free, and charging for it (by suggesting users need a pro upgrade to see/use it) seems deceptive to me.
Whats next, following RSS feeds from Reddit is a pro feature? From NYT? From my blog? From any blog not in a publishing partnership with Feedly?
I feel petty for writing this post. If you like Feedly, use and pay for Feedly by all means. But on a personal note I am extremely passionate about what RSS is all about: a simple, free, organized way of following the websites you love. I hate to see any site drop RSS support, and honestly Feedly has done a lot to keep the idea of RSS going after Google Readers death.
But this feels like a step in the wrong direction, and honestly Im nervous about the future of Feedly and its publisher SDK. Even adding a "Feedly button" makes me nervous (note that I have no problem with their suggestions for open-standard feed optimizations). RSS is inherently open and usable by any feed reader, anytime, anywhere. Consolidating control over the platform, as in encouraging publishers to add Feedly-specific content or features, even adding "Subscribe in Feedly" buttons (presuming they are placed in-lieu of normal RSS feed subscription links) is dangerous. It may allow Feedly to give a better experience to their customers, but only to their customers. The rest of us, who use other readers? My ultimate fear is that publishers will follow suit, drop standard RSS support (as some have done in favor of Twitter or E-mail newsletters), and RSS will finally truly die.
Its worthwhile to remember that when Google Reader died, we all so easily moved over to Feedly... why? Because RSS as a service was open, transferable, free, public, cross-compatible. Thats likely why Google mostly dropped it. If RSS becomes FSS (Feedly Subscription Service), or any other specific companys domain, then what we love about RSS will be gone. Dead. Just another Twitter-like service. Keep that in mind when you decide which RSS reader you want to support by becoming a paid user.
On the flip side, I could be totally wrong, and Feedlys efforts turn out to revitalize the moribund RSS arena, and the rising tide will raise all ships. Thats the ideal, but as the open web becomes less open everyday, I wonder how much longer well be able to enjoy the humble RSS feed.
Thanks for reading, and for more of my comparisons, see this series Part 1, Part 2, Part 3, and Part 4 if youre interested.
Subscribe to:
Posts (Atom)