Showing posts with label arduino. Show all posts
Showing posts with label arduino. Show all posts
Monday, August 29, 2016
Arduino and Genuino MKR1000 Development Workshop
Arduino and Genuino MKR1000 Development Workshop


Arduino and Genuino MKR1000 are IoT development board which is based on the Atmel ATSAMW25 SoC. This book helps you to get started with Arduino and Genuino MKR1000 development.
The following is highlight topics in this book:
* Setting up Development Environment
* Sketch Programming
* Working with SPI
* Working with I2C
* Arduino WiFi Networking
* Building IoT Application
* Working with Internal RTC and Sleep Mode
* Controlling Arduino through Firmata Protocol
* Working with Firmata Protocol over WiFi
* Arduino Cloud

Sunday, August 28, 2016
Arduino Uno RFID RC522 MFRC522 library example DumpInfo
Arduino Uno RFID RC522 MFRC522 library example DumpInfo


This post show how Arduino Uno + RFID-RC522 (RFID reader) to dump info of RFID key and RFID card, using Arduino RFID Library for MFRC522.
Arduino library for MFRC522 and other RFID RC522 based modules (https://github.com/miguelbalboa/rfid) read and write different types of Radio-Frequency IDentification (RFID) cards on your Arduino using a RC522 based reader connected via the Serial Peripheral Interface (SPI) interface.
Install MFRC522 library to Arduino IDE:
You can download ZIP file from the library web page, and it to Arduino library, read the video below. After library added, it will be in the folder your_DocumentsArduinolibraries,
and fritzing parts is in your_DocumentsArduinolibraries fid-masterdocfritzing.

Connect Arduino Uno and RFID-RF522 module:

In Arduino IDE, Open Example of DumpInfo in MFRC522:
/*
 * ----------------------------------------------------------------------------
 * This is a MFRC522 library example; see https://github.com/miguelbalboa/rfid
 * for further details and other examples.
 *
 * NOTE: The library file MFRC522.h has a lot of useful info. Please read it.
 *
 * Released into the public domain.
 * ----------------------------------------------------------------------------
 * Example sketch/program showing how to read data from a PICC (that is: a RFID
 * Tag or Card) using a MFRC522 based RFID Reader on the Arduino SPI interface.
 *
 * When the Arduino and the MFRC522 module are connected (see the pin layout
 * below), load this sketch into Arduino IDE then verify/compile and upload it.
 * To see the output: use Tools, Serial Monitor of the IDE (hit Ctrl+Shft+M).
 * When you present a PICC (that is: a RFID Tag or Card) at reading distance
 * of the MFRC522 Reader/PCD, the serial output will show the ID/UID, type and
 * any data blocks it can read. Note: you may see "Timeout in communication"
 * messages when removing the PICC from reading distance too early.
 *
 * If your reader supports it, this sketch/program will read all the PICCs
 * presented (that is: multiple tag reading). So if you stack two or more
 * PICCs on top of each other and present them to the reader, it will first
 * output all details of the first and then the next PICC. Note that this
 * may take some time as all data blocks are dumped, so keep the PICCs at
 * reading distance until complete.
 *
 * Typical pin layout used:
 * -----------------------------------------------------------------------------------------
 * MFRC522 Arduino Arduino Arduino Arduino Arduino
 * Reader/PCD Uno Mega Nano v3 Leonardo/Micro Pro Micro
 * Signal Pin Pin Pin Pin Pin Pin
 * -----------------------------------------------------------------------------------------
 * RST/Reset RST 9 5 D9 RESET/ICSP-5 RST
 * SPI SS SDA(SS) 10 53 D10 10 10
 * SPI MOSI MOSI 11 / ICSP-4 51 D11 ICSP-4 16
 * SPI MISO MISO 12 / ICSP-1 50 D12 ICSP-1 14
 * SPI SCK SCK 13 / ICSP-3 52 D13 ICSP-3 15
 */

#include <SPI.h>
#include <MFRC522.h>

#define RST_PIN 9 //
#define SS_PIN 10 //

MFRC522 mfrc522(SS_PIN, RST_PIN); // Create MFRC522 instance

void setup() {
 Serial.begin(9600); // Initialize serial communications with the PC
 while (!Serial); // Do nothing if no serial port is opened (added for Arduinos based on ATMEGA32U4)
 SPI.begin(); // Init SPI bus
 mfrc522.PCD_Init(); // Init MFRC522
 ShowReaderDetails(); // Show details of PCD - MFRC522 Card Reader details
 Serial.println(F("Scan PICC to see UID, type, and data blocks..."));
}

void loop() {
 // Look for new cards
 if ( ! mfrc522.PICC_IsNewCardPresent()) {
 return;
 }

 // Select one of the cards
 if ( ! mfrc522.PICC_ReadCardSerial()) {
 return;
 }

 // Dump debug info about the card; PICC_HaltA() is automatically called
 mfrc522.PICC_DumpToSerial(&(mfrc522.uid));
}

void ShowReaderDetails() {
 // Get the MFRC522 software version
 byte v = mfrc522.PCD_ReadRegister(mfrc522.VersionReg);
 Serial.print(F("MFRC522 Software Version: 0x"));
 Serial.print(v, HEX);
 if (v == 0x91)
 Serial.print(F(" = v1.0"));
 else if (v == 0x92)
 Serial.print(F(" = v2.0"));
 else
 Serial.print(F(" (unknown)"));
 Serial.println("");
 // When 0x00 or 0xFF is returned, communication probably failed
 if ((v == 0x00) || (v == 0xFF)) {
 Serial.println(F("WARNING: Communication failure, is the MFRC522 properly connected?"));
 }
}
- Similarly example run on Android: Android NFC: readBlock() for MifareClassic, to dump data in RFID tag
- Step-by-step to make MFRC522-python work on Raspberry Pi 2/raspbian Jessie, read RFID tags using RFID Reader, RFID-RC522.
- Raspberry Pi 2 + MFRC522-python - Dump RFID Tag data using mxgxw/MFRC522-python
Android BluetoothChat connect to Arduino Uno HC 05
Android BluetoothChat connect to Arduino Uno HC 05
Last example show "Android BluetoothChat example link with HC-05 Bluetooth", to connect to PC via FTDI adapter. Here is another example - Arduino UNO + HC-05 to echo received data back to the sender.
For my on-hand HC-05 sample, it set as slave role and 9600, 0, 0, PIN="1234" by default. So it can be used in this example without any extra setting.

Connection between UNO and HC-05
HC-05 Rx - Uno Tx (1)
HC-05 Tx - Uno Rx (0)
HC-05 GND - Uno GND
HC-05 VCC - Uno 5V
(My HC-05 marked "Power: 3.6V-6V", refer here, make sure your HC-05 can work on 5V.)
Uno_Serial_echo.ino
/*
Arduino Uno + HC-05 (Bluetooth) - echo bluetooth data

Serial (Tx/Rx) communicate to HC-05
HC-05 Rx - Uno Tx (1)
HC-05 Tx - Uno Rx (0)
HC-05 GND - Uno GND
HC-05 VCC - Uno 5V

*/

void setup()
{
 delay(1000);
 Serial.begin(9600);
}

void loop()
{
 while(Serial.available())
 {
 char data = Serial.read();
 Serial.write(data);
 }
}
This video show how Android BluetoothChat example link with Arduino UNO + HC-05. For the Android BluetoothChat example, refer last post.
Related:
- Connect Arduino Due with HC-06 (Bluetooth Module)
Saturday, August 27, 2016
First look at the WeMos D1 Arduino compatible ESP8266 Wifi Board from Banggood com
First look at the WeMos D1 Arduino compatible ESP8266 Wifi Board from Banggood com
This video take a look at the WeMos D1: a Wi-Fi enabled Arduino compatible board based on the ESP8266 chip. The price of it is so tempting, less than 9$.

The ESP8266EX chip that the WeMos D1 board uses offers:
• A 32 bit RISC CPU running at 80MHz
• 64Kb of instruction RAM and 96Kb of data RAM
• 4MB flash memory! Yes that’s correct, 4MB!
• Wi-Fi
• 16 GPIO pins
• I2C,SPI
• I2S
• 1 ADC
--------------------
CODE OF THE PROJECT
--------------------
http://educ8s.tv/arduino-esp8266-tutorial-first-look-at-the-wemos-d1-arduino-compatible-esp8266-wifi-board/
Friday, August 26, 2016

Building Arduino Projects for the Internet of Things
Building Arduino Projects for the Internet of Things


This is a book about building Arduino-powered devices for everyday use, and then connecting those devices to the Internet. If youre one of the many who have decided to build your own Arduino-powered devices for IoT applications, youve probably wished you could find a single resource--a guidebook for the eager-to-learn Arduino enthusiast--that teaches logically, methodically, and practically how the Arduino works and what you can build with it.
Building Arduino Projects for the Internet of Things: Experiments with Real-World Applications is exactly what you need. Written by a software developer and solution architect who got tired of hunting and gathering various lessons for Arduino development as he taught himself all about the topic, this book gives you an incredibly strong foundation of Arduino-based device development, from which you can go in any direction according to your specific development needs and desires.
Readers are introduced to the building blocks of IoT, and then deploy those principles to by building a variety of useful projects. Projects in the books gradually introduce the reader to key topics such as internet connectivity with Arduino, common IoT protocols, custom web visualization, and Android apps that receive sensor data on-demand and in realtime. IoT device enthusiasts of all ages will want this book by their side when developing Android-based devices.
What Youll Learn:
- Connect an Arduino device to the Internet
- Creating an Arduino circuit that senses temperature
- Publishing data collected from an Arduino to a server and to an MQTT broker
- Setting up channels in Xively
- Setting up an app in IBM Bluematrix
- Using Node-RED to define complex flows
- Publishing data visualization in a web app
- Reporting motion-sensor data through a mobile app
- Creating a remote control for house lights
- Creating a machine-to-machine communication requiring no human intervention
- Creating a location-aware device
Arduino and Android using MIT app inventor 2 0 Learn in a day
Arduino and Android using MIT app inventor 2 0 Learn in a day
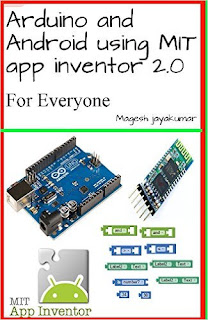

This book is about creating fun projects with arduino and android, this book will be very useful for people who are looking to create some cool projects and are not excellent with coding skills, This book will make anyone to create their own android and arduino project within few hours. This book will be very useful for children to create their own projects with their parents guidance. This book will cover the basics of MIT app inventor and this book needs user to have little experience with arduino on how to upload code to arduino and how to verify datas in serial monitor.
Thursday, August 25, 2016
Arduino Development for OSX and iOS
Arduino Development for OSX and iOS


This is a special book for readers who want to learn Arduino development on OSX and iOS environments. The following is highlight topics on this book:
- Preparing development environment
- Sketch programming
- Controlling Arduino from OSX
- Controlling Arduino from iOS
- Debugging Arduino Logic
Beginning C for Arduino Second Edition Learn C Programming for the Arduino
Beginning C for Arduino Second Edition Learn C Programming for the Arduino


Beginning C for Arduino, Second Edition is written for those who have no prior experience with microcontrollers or programming but would like to experiment and learn both. Updated with new projects and new boards, this book introduces you to the C programming language, reinforcing each programming structure with a simple demonstration of how you can use C to control the Arduino family of microcontrollers. Author Jack Purdum uses an engaging style to teach good programming techniques using examples that have been honed during his 25 years of university teaching.
Beginning C for Arduino, Second Edition will teach you:
- The C programming language
- How to use C to control a microcontroller and related hardware
- How to extend C by creating your own libraries, including an introduction to object-oriented programming
What you’ll learn
- The syntax of the C programming language as defined for the Arduino
- Tried and true coding practices (applicable to any programming language)
- How to design, code, and debug programs that drive Arduino microcontrollers
- How to extend the functionality of C
- How to integrate low cost, off-the-shelf, hardware shields into your own projects
The book is aimed at a complete novice with no programming background. It assumes no prior programming or hardware design experience and is written for creative and curious people who would like to blend a software and hardware learning experience into a single, enjoyable endeavor.
Table of Contents
- Introduction to Arduino Microcontrollers
- Arduino C
- Data Types
- Decision Making in C
- Program Loops
- Functions in C
- Storage Classes and Scope
- Introduction to Pointers
- Using Pointers Effectively
- I/O Operations
- The C Preprocessor
- A Gentle Introduction to Object-Oriented Programming
- Arduino Libraries
- Arduino I/O
- Appendix A - Suppliers
- Appendix B - Hardware Components
Tuesday, August 23, 2016
Control Arduino Genuino 101 onboard LED from Android iOS via Bluetooth Low Energy BLE
Control Arduino Genuino 101 onboard LED from Android iOS via Bluetooth Low Energy BLE
From Arduino IDE with Arduino/Genuino 101 board installed, its a CallbackLED example to test Arduino/Genuino 101 Bluetooth Low Energy (BLE) capabilities to turn on and of the LED connected to Pin 13 from a Android or iOS.

In Arduino IDE, open and download the CallbackLED example:
- File > Examples > CurieBLE > CallbackLED
CallbackLED.ino
/*
 Copyright (c) 2015 Intel Corporation. All rights reserved.

 This library is free software; you can redistribute it and/or
 modify it under the terms of the GNU Lesser General Public
 License as published by the Free Software Foundation; either
 version 2.1 of the License, or (at your option) any later version.

 This library is distributed in the hope that it will be useful,
 but WITHOUT ANY WARRANTY; without even the implied warranty of
 MERCHANTABILITY or FITNESS FOR A PARTICULAR PURPOSE. See the GNU
 Lesser General Public License for more details.

 You should have received a copy of the GNU Lesser General Public
 License along with this library; if not, write to the Free Software
 Foundation, Inc., 51 Franklin Street, Fifth Floor, Boston, MA 02110-
 1301 USA
*/


#include <CurieBLE.h>

const int ledPin = 13; // set ledPin to use on-board LED
BLEPeripheral blePeripheral; // create peripheral instance

BLEService ledService("19B10000-E8F2-537E-4F6C-D104768A1214"); // create service

// create switch characteristic and allow remote device to read and write
BLECharCharacteristic switchChar("19B10001-E8F2-537E-4F6C-D104768A1214", BLERead | BLEWrite);

void setup() {
 Serial.begin(9600);
 pinMode(ledPin, OUTPUT); // use the LED on pin 13 as an output

 // set the local name peripheral advertises
 blePeripheral.setLocalName("LEDCB");
 // set the UUID for the service this peripheral advertises
 blePeripheral.setAdvertisedServiceUuid(ledService.uuid());

 // add service and characteristic
 blePeripheral.addAttribute(ledService);
 blePeripheral.addAttribute(switchChar);

 // assign event handlers for connected, disconnected to peripheral
 blePeripheral.setEventHandler(BLEConnected, blePeripheralConnectHandler);
 blePeripheral.setEventHandler(BLEDisconnected, blePeripheralDisconnectHandler);

 // assign event handlers for characteristic
 switchChar.setEventHandler(BLEWritten, switchCharacteristicWritten);
// set an initial value for the characteristic
 switchChar.setValue(0);

 // advertise the service
 blePeripheral.begin();
 Serial.println(("Bluetooth device active, waiting for connections..."));
}

void loop() {
 // poll peripheral
 blePeripheral.poll();
}

void blePeripheralConnectHandler(BLECentral& central) {
 // central connected event handler
 Serial.print("Connected event, central: ");
 Serial.println(central.address());
}

void blePeripheralDisconnectHandler(BLECentral& central) {
 // central disconnected event handler
 Serial.print("Disconnected event, central: ");
 Serial.println(central.address());
}

void switchCharacteristicWritten(BLECentral& central, BLECharacteristic& characteristic) {
 // central wrote new value to characteristic, update LED
 Serial.print("Characteristic event, written: ");

 if (switchChar.value()) {
 Serial.println("LED on");
 digitalWrite(ledPin, HIGH);
 } else {
 Serial.println("LED off");
 digitalWrite(ledPin, LOW);
 }
}
On smartphone with BLE, download "nRF Master Control Panel (BLE)" app:
nRF Master Control Panel is a powerful generic tool that allows you to scan, advertise and explore your Bluetooth Smart (BLE) devices and communicate with them. nRF MCP supports number of Bluetooth SIG adopted profiles including Device Firmware Update profile (DFU) from Nordic Semiconductors.
- Android
- iOS
reference: http://www.arduino.cc/en/Tutorial/Genuino101CurieBLECallbackLED
Arduino for Secret Agents
Arduino for Secret Agents


About This Book
- Discover the limitless possibilities of the tiny Arduino and build your own secret agent projects
- From a fingerprint sensor to a GPS Tracker and even a robot– learn how to get more from your Arduino
- Build nine secret agent projects using the power and simplicity of the Arduino platform
This book is for Arduino programmers with intermediate experience of developing projects, and who want to extend their knowledge by building projects for secret agents. It would also be great for other programmers who are interested in learning about electronics and programming on the Arduino platform.
What You Will Learn
- Get to know the full range of Arduino features so you can be creative through practical projects
- Discover how to create a simple alarm system and a fingerprint sensor
- Find out how to transform your Arduino into a GPS tracker
- Use the Arduino to monitor top secret data
- Build a complete spy robot!
- Build a set of other spy projects such as Cloud Camera and Microphone System
Q might have Bonds gadgets– but he doesnt have an Arduino (not yet at least). Find out how the tiny Arduino microcomputer can be used to build an impressive range of neat secret agent projects that can help you go undercover and get to grips with the cutting-edge of the world of espionage with this book, created for ardent Arduino fans and anyone new to the powerful device.
Each chapter shows you how to construct a different secret agent gadget, helping you to unlock the full potential of your Arduino and make sure you have a solution for every tricky spying situation.
Youll find out how to build everything from an alarm system to a fingerprint sensor, each project demonstrating a new feature of Arduino, so you can build your expertise as you complete each project. Learn how to open a lock with a text message, monitor top secret data remotely, and even create your own Arduino Spy Robot, Spy Microphone System, and Cloud Spy Camera This book isnt simply an instruction manual – it helps you put your knowledge into action so you can build every single project to completion.
Style and approach
This practical reference guide shows you how to build various projects with step-by-step explanations on each project, starting with the assembly of the hardware, followed by basics tests of all those hardware components and finally developing project on the hardware.
Building a Wireless Security Camera with Arduino
Building a Wireless Security Camera with Arduino


Imagine being able to watch whats going on in your home while you are away. What if you could build your own wireless security camera using the Arduino platform and some basic components?
In Building a Wireless Security Camera with Arduino, Marco Schwartz from the Open Home Automation website presents a straight to the point method to build your own security camera device with Arduino.
In this book, you will learn:
- How to configure an Arduino Yun & connect a USB camera to the board
- How to assemble the hardware of your camera
- How to make the camera stream local & cloud live video
- How to automatically save pictures of intruders on Dropbox
Monday, August 22, 2016
Arduino Robotic Projects
Arduino Robotic Projects


Who This Book Is For
This book is for anyone who has been curious about using Arduino to create robotic projects that were previously the domain of research labs of major universities or defense departments. Some programming background is useful, but if you know how to use a PC, you can, with the aid of the step-by-step instructions in this book, construct complex robotic projects that can roll, walk, swim, or fly.
About This Book
- Develop a series of exciting robots that can sail, go under water, and fly
- Simple, easy-to-understand instructions to program Arduino
- Effectively control the movements of all types of motors using Arduino
- Use sensors, GSP, and a magnetic compass to give your robot direction and make it lifelike
Arduino is an open source microcontroller, built on a single circuit board that is capable of receiving sensory input from the environment and controlling interactive physical objects.
Arduino Robotic Projects starts with the fundamentals of turning on the basic hardware and then provides complete, step-by-step instructions that allow almost anyone to use this low-cost hardware platform. Youll build projects that can move using DC motors, walk using servo motors, and then add sensors to avoid barriers. Youll also learn how to add more complex navigational techniques such as GPRS so that your robot wont get lost.
Example of using jSSC communicate between JavaFX and Arduino Uno via USB Serial port
Example of using jSSC communicate between JavaFX and Arduino Uno via USB Serial port
Prepare a simple sketch run on Arduino Uno to send a counting number to serial port, tested on Windows 10.
BlinkUSB.ino
/*
 * Send number to Serial
 */
int i = 0;

// the setup function runs once when you press reset or power the board
void setup() {
 // initialize digital pin 13 as an output.
 pinMode(13, OUTPUT);
 Serial.begin(9600);
}

// the loop function runs over and over again forever
void loop() {

 Serial.print(i);
 i++;

 digitalWrite(13, HIGH); // turn the LED on (HIGH is the voltage level)
 delay(1000); // wait for a second
 digitalWrite(13, LOW); // turn the LED off by making the voltage LOW
 delay(1000); // wait for a second
}
Read last post to "Prepare jSSC - download and add library to NetBeans, and create project using jSSC library".
modify the java code, JavaFX_jssc_Uno.java
/*
 * Example of using jSSC library to handle serial port
 * Receive number from Arduino via USB/Serial and display on Label
 */
package javafx_jssc_uno;

import java.util.logging.Level;
import java.util.logging.Logger;
import javafx.application.Application;
import javafx.application.Platform;
import javafx.beans.value.ChangeListener;
import javafx.beans.value.ObservableValue;
import javafx.collections.FXCollections;
import javafx.collections.ObservableList;
import javafx.scene.Scene;
import javafx.scene.control.ComboBox;
import javafx.scene.control.Label;
import javafx.scene.layout.StackPane;
import javafx.scene.layout.VBox;
import javafx.stage.Stage;
import jssc.SerialPort;
import static jssc.SerialPort.MASK_RXCHAR;
import jssc.SerialPortEvent;
import jssc.SerialPortException;
import jssc.SerialPortList;

public class JavaFX_jssc_Uno extends Application {

 SerialPort arduinoPort = null;
 ObservableList<String> portList;

 Label labelValue;

 private void detectPort(){

 portList = FXCollections.observableArrayList();

 String[] serialPortNames = SerialPortList.getPortNames();
 for(String name: serialPortNames){
 System.out.println(name);
 portList.add(name);
 }
 }

 @Override
 public void start(Stage primaryStage) {

 labelValue = new Label();

 detectPort();
 final ComboBox comboBoxPorts = new ComboBox(portList);
 comboBoxPorts.valueProperty()
 .addListener(new ChangeListener<String>() {

 @Override
 public void changed(ObservableValue<? extends String> observable,
 String oldValue, String newValue) {

 System.out.println(newValue);
 disconnectArduino();
 connectArduino(newValue);
 }

 });

 VBox vBox = new VBox();
 vBox.getChildren().addAll(
 comboBoxPorts, labelValue);

 StackPane root = new StackPane();
 root.getChildren().add(vBox);

 Scene scene = new Scene(root, 300, 250);

 primaryStage.setTitle("Hello World!");
 primaryStage.setScene(scene);
 primaryStage.show();
 }

 public boolean connectArduino(String port){

 System.out.println("connectArduino");

 boolean success = false;
 SerialPort serialPort = new SerialPort(port);
 try {
 serialPort.openPort();
 serialPort.setParams(
 SerialPort.BAUDRATE_9600,
 SerialPort.DATABITS_8,
 SerialPort.STOPBITS_1,
 SerialPort.PARITY_NONE);
 serialPort.setEventsMask(MASK_RXCHAR);
 serialPort.addEventListener((SerialPortEvent serialPortEvent) -> {
 if(serialPortEvent.isRXCHAR()){
 try {
 String st = serialPort.readString(serialPortEvent
 .getEventValue());
 System.out.println(st);

 //Update label in ui thread
 Platform.runLater(() -> {
 labelValue.setText(st);
 });

 } catch (SerialPortException ex) {
 Logger.getLogger(JavaFX_jssc_Uno.class.getName())
 .log(Level.SEVERE, null, ex);
 }

 }
 });

 arduinoPort = serialPort;
 success = true;
 } catch (SerialPortException ex) {
 Logger.getLogger(JavaFX_jssc_Uno.class.getName())
 .log(Level.SEVERE, null, ex);
 System.out.println("SerialPortException: " + ex.toString());
 }

 return success;
 }

 public void disconnectArduino(){

 System.out.println("disconnectArduino()");
 if(arduinoPort != null){
 try {
 arduinoPort.removeEventListener();

 if(arduinoPort.isOpened()){
 arduinoPort.closePort();
 }

 } catch (SerialPortException ex) {
 Logger.getLogger(JavaFX_jssc_Uno.class.getName())
 .log(Level.SEVERE, null, ex);
 }
 }
 }

 @Override
 public void stop() throws Exception {
 disconnectArduino();
 super.stop();
 }

 public static void main(String[] args) {
 launch(args);
 }

}
Next:
- JavaFX + jSSC - read byte from Arduino Uno, read from Analog Input
Sunday, August 21, 2016
Arduino LCD Projects
Arduino LCD Projects


Several Arduino LCD projects using both text based LCDs as well as graphics LCDs. Learn how to interface the Arduino UNO to several different LCDs. Includes projects like a 100,000 samples per second oscilloscope, and a two million samples per second logic analyzer.
Robert J Daviss another book “Arduino Oscilloscope Projects”.
AltSoftSerial Library for Arduino Boards
AltSoftSerial Library for Arduino Boards
AltSoftSerial is a software emulated serial library for Arduino boards, using hardware timers for improved compatibility.

AltSoftSerial is particularly useful when simultaneous data flows are needed. It is capable of running up to 57600 baud on 16 MHz AVR with up to 9 µs interrupt latency from other libraries. Slower baud rates are recommended when other code may delay AltSoftSerials interrupt response by more than 9 µs.
AltSoftSerial Library can be installed to Arduino IDE using Library Manager.
Arduino Meets Linux The Users Guide to Arduino Yún Development
Arduino Meets Linux The Users Guide to Arduino Yún Development


The Yún is one of the most powerful and flexible hardware development boards in the Arduino range. It combines the ease-of-use of the Arduino platform, with the power of a 400 MHz Atheros AR9331 Wi-Fi system-on-chip (WiSOC) that runs Linux.
But if you are not experienced and confident in working with Linux-based operating systems, it may be difficult for you to use the Yún to its full potential.
Bob Hammell is the author of popular Arduino learning resources, such as Connecting Arduino: Programming and Networking with the Ethernet Shield. In this book, he guides you through all of the Arduino Yún’s features and explains how to make use of this unique board.
Using interesting and fun examples, in Arduino Meets Linux: The User’s Guide to Arduino Yún Development you can learn how to:
- Connect your Arduino Yún to your network, using built-in support for Wi-Fi and Ethernet;
- Work with OpenWrt-Yun Linux through the command line;
- Use the Bridge Library to communicate and share data between both of the Yúns chips;
- Write Python and shell scripts to automate tasks and use the power of the AR9331 in your Arduino projects;
- Work with Temboo and third-party APIs to access popular web services;
- Host your own websites and application programming interfaces (APIs) on the Yún;
- Use USB devices, such as audio interfaces and gamepads from Microsoft Xbox 360® and Sony PlayStation® games consoles;
- Build Arduino projects that act as a keyboard or mouse when you plug your Yún into a PC or Mac;
- Add voice recognition and speech to your Arduino projects;
- Download source code, view demo videos, and access extra projects from the books companion website, ArduinoMeetsLinux.com;
- And much, much more.
With the Arduino Yún, you can take your Arduino projects to the next level. This book shows you how.
Arduino Leonardo and Arduino Micro A Hands On Guide for Beginner
Arduino Leonardo and Arduino Micro A Hands On Guide for Beginner


Arduino Leonardo and Arduino/Genuino Micro are development boards which runs ATmega32U4. This book helps you to get started with Arduino Leonardo and Arduino/Genuino Micro development. Several case samples are provided to accelerate your learning. The following is highlight topics in this books:
* Preparing Development Environment
* Setting Up Arduino Leonardo and Arduino Micro
* Writing and Reading Digital Data
* PWM and Analog Input
* Working with I2C
* Working with SPI
* Accessing EEPROM
* Arduino Networking
* Keyboard and Mouse HID
Thursday, August 18, 2016
Arduino Wearable Projects
Arduino Wearable Projects


About This Book
- Develop an interactive program using sensors and actuators suitable with wearables
- Understand wearable programming with the help of hands-on projects
- Explore different wearable design processes in the Arduino platform and customize them to fit your individual needs
This book is intended for readers who are familiar with the Arduino platform and want to learn more about creating wearable projects. No previous experience in wearables is expected, although a basic knowledge of Arduino programming will help.
What You Will Learn
- Develop a basic understanding of wearable computing
- Learn about Arduino and its compatible prototyping platforms suitable for creating wearables
- Understand the design process surrounding the creation of wearable objects
- Gain insight into the materials suitable for developing wearable projects
- Design and create projects including interactive bike gloves, GPRS locator watch, and more using various kinds of electronic components
- Discover programming for interactivity
- Learn how to connect and interface wearables with Bluetooth and WiFi
- Get your hands dirty with your own personalized designs
The demand for smart wearable technologies is becoming more popular day by day. The Arduino platform was developed keeping wearables, such as watches that track your location or shoes that count the miles youve run, in mind. It is basically an open-source physical computing platform based on a simple microcontroller board and a development environment in which you create the software for the board. If youre interested in designing and creating your own wearables, this is an excellent platform for you.
This book provides you with the skills and understanding to create your own wearable projects. The book covers different prototyping boards which are compatible with the Arduino platform and are suitable for creating wearable projects. Each chapter of the book covers a project in which knowledge and skills are introduced gradually, making the book suitable for all kinds of readers.
You begin your journey with understanding electronic components, including LEDs and sensors, to get yourself up to scratch and comfortable with different components. You will then gain hands-on experience by creating your very first wearable project, a pair of interactive bike gloves that help you cycle at night. This is followed by a project making your own funky LED glasses and a cool GPS watch. Youll also delve into other projects including creating your own keyless doorlock, wearable NFC tags, a fitness-tracking device, and a WiFi-enabled spark board. The final project is a compilation of the previous concepts used where you make your own smart watch with fitness tracking, internet-based notifications, GPS, and of course time telling.
Style and approach
This is a project-based book that introduces each project to the reader step-by-step. Each project starts out by covering all the components individually, and then explains how to combine them into interactive objects. Each project contains an easy-to-follow guide to design and implement the electronics into wearable objects.
Wednesday, August 17, 2016
Arduino A Technical Reference A Handbook for Technicians Engineers and Makers In a Nutshell
Arduino A Technical Reference A Handbook for Technicians Engineers and Makers In a Nutshell


Rather than yet another project-based workbook, Arduino: A Technical Reference is a reference and handbook that thoroughly describes the electrical and performance aspects of an Arduino board and its software.
This book brings together in one place all the information you need to get something done with Arduino. It will save you from endless web searches and digging through translations of datasheets or notes in project-based texts to find the information that corresponds to your own particular setup and question.
Reference features include pinout diagrams, a discussion of the AVR microcontrollers used with Arduino boards, a look under the hood at the firmware and run-time libraries that make the Arduino unique, and extensive coverage of the various shields and add-on sensors that can be used with an Arduino. One chapter is devoted to creating a new shield from scratch.
The book wraps up with detailed descriptions of three different projects: a programmable signal generator, a "smart" thermostat, and a programmable launch sequencer for model rockets. Each project highlights one or more topics that can be applied to other applications.
Subscribe to:
Posts (Atom)